• Skip to primary navigation
  • Skip to main content
  • Skip to footer
  • Home
  • Articles
    • ✍🏽 Online Creators
    • 🎯 Better Living
    • 📚 Knowledge Management
    • 🧠 Learning Hacks
    • 🧱 Transforming Education
  • Courses

learntrepreneurs

make the most of your mind

  • About Eva
  • Books
  • Contact

✍🏽 Online Creators

How to Build a High-Quality Website to Best Market Your Business Online

October 28, 2020 by Eva Keiffenheim


An affiliate-free beginner’s guide to wordpress.org

Wordpress Backend Site displayed on a Computer
Photo by Stephen Phillips — Hostreviews.co.uk on Unsplash

What do Snoop Dogg, Quartz, Alanis Morisette, the Obama Foundation, and Vogue have in common?

They all run their stunning sites on wordpress.org.

But you don’t need to be rich or famous to have a great website. Thanks to WordPress.org, you can build a beautiful, unique place to best market your business for less than $150.

Whether you’re a freelancer showcasing your portfolio, a founder building your brand’s identity, or a hustler trying to generate passive income with an e-commerce store—marketing your presence with a WordPress site is a great way to reach a broader audience.

In the past three years, I’ve built over 10 WordPress sites for entrepreneurs, start-ups, and e-commerce stores. Here’s how you can get started.


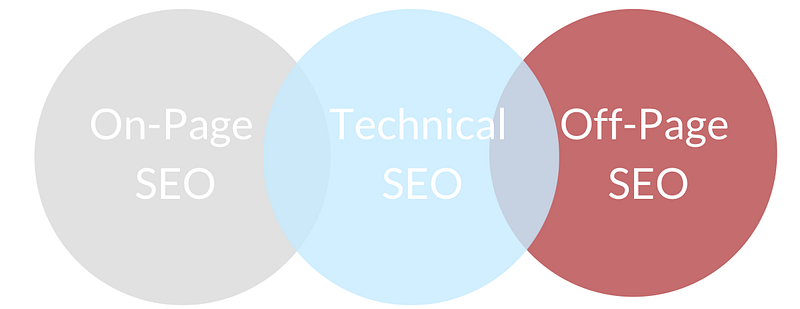
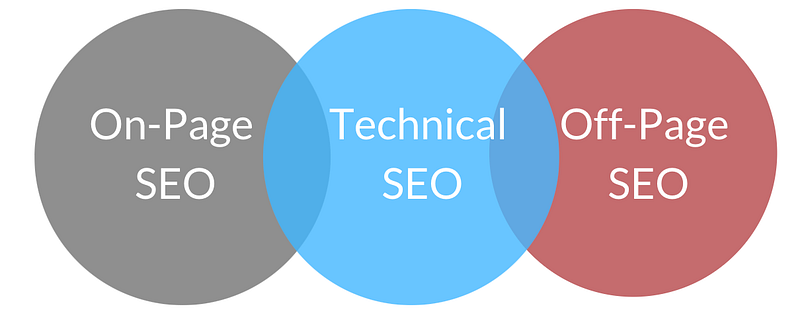
1. Choose Your Hosting Platform

First, you want to choose where to host your website. There are plenty of so-called hosting providers. A quick Google search will show you tons of providers that specialize in managed WordPress hosting.

You can compare choosing a web host to picking an apartment. How much space do you need? It’ll be more if you intend to run an e-commerce store with tons of items and less if you offer three types of yoga classes.

I’ve hosted websites with four different providers (world4you, Strato, Checkdomain, and GoDaddy). To be honest, they’re all very similar to each other. You can’t do much wrong as long as your choice includes managed WordPress hosting and has over 1,000 trustworthy user reviews.


2. Pick a Domain and Install WordPress

Once you’re set for a hosting platform, you want to buy a domain. A domain is the name of your site. When you look at www.medium.com, for example, the domain name is Medium.

From a marketing perspective, your domain should represent your brand. Picking a name that supports your communication can make your message more effective. This site allows you to explore your name’s availability on different marketing platforms.

If you haven’t bought a domain yet, go with your hosting provider. If you buy the domain with your host, you have everything done in one place. You save the step of transferring a domain to your existing provider.

Once you give your website a name, you want to install the general WordPress framework on this domain. Usually, installing WordPress equals a quick button-click and a confirmation email — that’s why you chose a managed WordPress host in the first place.

Now you’ve figured out the technical prerequisites, and you’re all set for the fun part.


3. Buy a WordPress Theme

This will make or break your website. With your host, you chose the size of your apartment. With your WordPress theme, you’re buying the furniture. While you will still be able to change cushions or your walls’ color, it’ll be time-intensive to buy a new kitchen or wardrobe once you live there.

Just like in real life, you want to spend some time buying your furniture. A WordPress theme is a one-time investment so that I wouldn’t factor the price into the equation. If you use the site for five years, there’s not much difference between a $30, $50, or $80 theme.

You pay for the programming service that’s been done for you. WordPress themes are the reason why you don’t need to code.

Three steps make picking the right theme easier.

  1. Find 3 websites you love and you want your website to look similar to.
  2. Browse WordPress theme marketplaces (like this one, this one, or this one) to research 3–5 WordPress themes that have templates with a similar look and feel.
  3. Compare your theme shortlist in terms of documentation (how intuitive are the how-to guides), user numbers (the more people use the template, the better), and reviews.

Once you’ve picked your favorite template, you can download the .zip file and install the theme in your WordPress backend.


4. Determine Your Corporate Identity

Corporate identity is the most crucial part of marketing your business online. These five parts make up your corporate identity, meaning the way you present yourself online: logo, typography, color palette, imagery, and iconography.

Logo

If you’re on a budget, you can use platforms like Canva to create your own logo. The better option is to find a freelance designer on UpWork or Fiverr to make a logo for you.

For the website, you want it as a .png file with a transparent background, ideally in two versions: one for a white background and one for a darker background.

Typography

There is an entire science behind the anatomy of typography and font pairing. Make it as complicated as you want.

A more pragmatic way than downloading and installing a very unique font on your WordPress theme is to pick a preinstalled font that is also a Google font. That way, you can use the font in all of your documents.

Color Palette

Similar to fonts, there is also a ridiculous number of marketers who discuss the meaning of specific colors. Again, spend as much time on it as you want. You can also hire a freelancer to do the color scheme for you.

Since I discovered this website, I love to do the color setting part on my own.

Imagery

Now this one is tricky. Just like your WordPress theme, images on your website make your website look unique and beautiful, or boring and cheap.

To get the best images, hire a photographer, or use high-quality stock images from sites like Pexels, Pixabay, or Adobe Stock.

Iconography

Most WordPress themes come with a stock of existing icons. If not, you can use platforms like thenounproject or undraw to come up with good icons.


5. Individualize Your Page

Once you figured your corporate identity, you can start customizing your page. Most WordPress themes come with a setup manual that tells you how to implement your logo, typography, color plate, imagery, and iconography into the page.

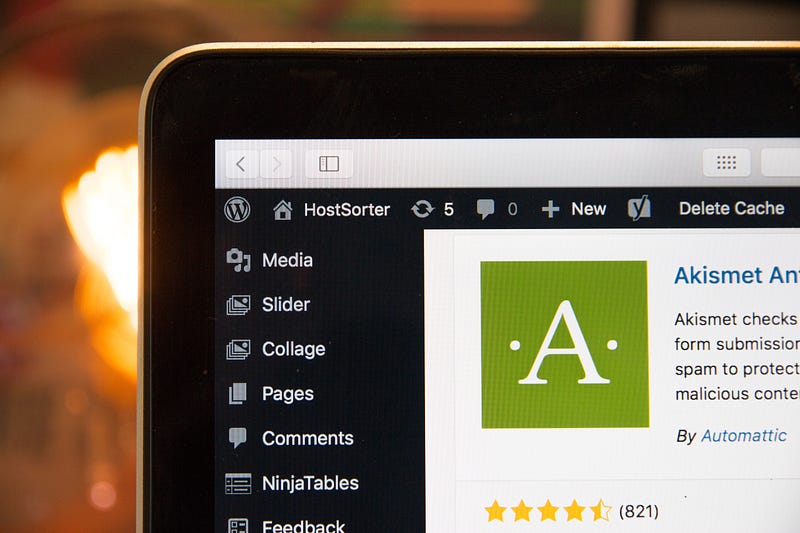
Apart from the built-in features of your template, you can add powerful plug-ins to improve your marketing. You can include a Mailchimp or ConvertKit Plugin to collect email addresses. If you connect Google Analytics to your page, you gain insights into your visitor’s behavior. Plus, plug-ins like Yoast will level up your organic search performance.

As 37% of all websites on the internet run on WordPress, developers are constantly creating and optimizing plug-ins for WordPress sites. Whatever you’re trying to build, a simple Google search will likely offer you a solution for your site.


In Conclusion

In 2020, building a unique website to market your business doesn’t need to be expensive, nerve-racking, or difficult.

On the contrary, it can be cost-effective, inspiring, and fun. Again, here are the five steps it takes.

  1. Choose your web-hosting provider.
  2. Pick a domain and install the WordPress CMS.
  3. Buy a WordPress theme.
  4. Determine your corporate identity.
  5. Individualize your page with plug-ins.

Starting and building a website takes work. But with a bit of time and a problem-solving mindset, you can make it work.

Filed Under: ✍🏽 Online Creators Tagged With: marketing, websites

9 Free Writing Tools That Helped Me Make $4,167 In One Month

September 18, 2020 by Eva Keiffenheim


They can do the same for you.

Photo by Khachik Simonian on Unsplash

Let’s get this clear: Your writing won’t bring you money because of these tools.

Sitting down to write will make your writing better. With quantity comes quality, my writing coach continues used to say. And she was right.

I wrote my first Medium article on March 27. Since then, I have published 55 pieces with a >80% curation rate. In August, I earned $4,167 on Medium alone.

Screenshot by Author

And while these tools won’t turn you into a professional writer, they will level up your writing process.

Whether you’re struggling with headlines, keeping a writing routine, or are non-native speakers, these priceless tools will help.


1 Manage Your Articles With Trello

Trello is an idea keeper, a writing tracker, and a motivation booster. Here’s how I use my Trello Board, from left to right:

  • Medium Article Ideas
  • Working Projects
  • Articles Submitted to Publications
  • Articles Rejected by Publications that need Reediting
  • Articles Published

When to use it:

Your Trello board will be useful on five occasions.

  1. When an idea strikes you. Add the title or the idea as a new card to your very left corner. You can also access it from mobile. Write down everything that comes to your mind.
  2. When you start writing. Because of all the article ideas on your board, you’ll never have to worry about a blank page in front of you. When you start a new story, pick one of your ideas, drag them to the “Working Projects” column, and start writing.
  3. When you hit publish. This is a motivational booster. It feels great to move a working project card to the “articles submitted” column. In the card add a date when you expect to hear back. Thereby, you’ll see when you need to follow-up or submit your piece to another publication.
  4. When the publication publishes or rejects your piece. Being rejected is part of every writer’s journey. Move your card to “rejected” and improve your piece. Then, give it a new shot at another publication.
  5. When a publication publishes your piece. Boom! You’ll move your card from “submitted to publication” to “published.”
Screenshot by Author

2 Improve Your Headlines with Co-Schedule

Most writers ignore this fact. They write great content and bad headlines. Yet, readers will never read your writing if your headline isn’t catchy.

Nobody will read your article if your headline sucks.

I ignored this fact until I completed Benjamin Hardy, PhD’s online course writing course. He takes 20–30 minutes every time he writes an article. He’d jot down 10–30 headlines before he starts to write.

Headline writing is a craft. It leaves the reader asking questions and wanting more.

Headlines consist of a combination of words. And while there are great articles on headline hacks, this tool does a quick check-up for you.

When to use it:

Opinions vary on this one. I love to find the headline before I start writing. It’ll help me frame my idea in various contexts. Moreover, a clear headline will help you structure the content.

Screenshot by Author

3 Format Your Headlines With Title Case Converter

After you mastered the balancing act of crafting a headline that grabs the reader’s attention, you’ll want to format it. Many publications reject articles because of their first impression.

When to use it:

I use Title Case Converter before I paste the headline into my story.

Screenshot by Author

4 Look Beyond Unsplash Pictures

After you’ve leveled up your writing with a great and proper formatted headline, you want to make sure you choose an awesome picture.

Search images by emotions instead of keywords. Pick a picture that supports the feeling you’re trying to convey. Tim Denning is an incredible picture picker.

When you analyze his images, you’ll see he searches beyond Medium’s built-in Unsplash feature. Here’s a list of links to free high-quality stock images:

  • Pexels
  • StockSnap
  • Reshot
  • Pixabay
  • Flickr
  • Freepik
  • Burst

When to use it:

After you set and formatted the headline, and before you start writing.


5 Use A Leftover Graveyard To Edit Without Mercy

Excellent writing requires ruthless editing. A leftover graveyard is a simple tool for producing clear, dense, and solid writing.

It’s a simple text document containing every phrase that wasn’t good enough to remain in your piece but was too beautiful to be deleted.

With every passage, ask yourself: Does this add value for the reader?

If the answer is yes, keep what you wrote. If the answer is nay, move sections or words to your graveyard. Every time you doubt whether you should delete a sentence, cut the sentence out, and paste it into your leftover document.

When to use it:

When you do the editing after you’ve written your article.

Screenshot by Author

6 Engage Your Reader With Thesaurus

If you’re also a non-native English speaker, a synonym finder is a pure piece of gold. It’ll find words outside of your vocabulary and give you suggestions on how to use them.

By adding variety to your writing, you’ll make your texts more interesting.

When to use it:

I use it at the same time as the leftover graveyard. In my first round of editing, I’d cut out everything that’s not needed and look for words that make the writing better.

Screenshot by Author

7 Run a Health Check With Grammarly

Grammarly has gained a lot of popularity within the last year. And it’s well-deserved. This writing tool checks your writing for grammar and punctuation mistakes.

And, in the pro-version, it also offers suggestions on how to replace your words.

Yet, don’t let Grammarly ruin your copy. It’ll sometimes be very strict on suggestions and make you want to reach the 99, even though a 78 score might be more authentic and humane.

When to use it:

To ensure it’ll not change your message, only use it after your round of self-editing. A grammar health check will give your piece the final touch.

Screenshot by Author

8 Do A Second Audit With The Hemmingway App

Even though I love Grammarly, it’s not perfect. So anytime I submit a piece, I’d make it run through the Hemingway App and look for phrases that are very hard to read.

Most of the times, the very hard to read phrases contain some logical errors. I’ll try to split them into two sentences or change the overall structure.

By focusing on clear, logical writing throughout your entire article, you’ll attract more readers, and, after all, take your writing to the next level.

When to use it:

After you’ve run your writing through Grammarly and before you hit publish.

Screenshot by Author

9 Analyze Your Articles With an Excel Sheet

I first learned about this sheet in Sinem’s Medium Writing Academy. It’s a self-made excel sheet you can use after you publish your article. It serves as an analyzer and a motivator.

This sheet helps you to do more of what works well. Moreover, this system helps you keep track of the number of articles published, your curation tags, and the publications you’ve published with. You can use your sheet to set your writing KPIs.

When to use it:

Once a publication published your piece add all the details to the sheet. Once a month, add the stats and the numbers.

Screenshot by Author

Do you want to learn more about my writing journey? Join the E-Mail List.

Filed Under: ✍🏽 Online Creators Tagged With: Tools, Writing

9 Free Writing Tools That Helped Me Make $4,167 a Month

September 18, 2020 by Eva Keiffenheim


Let’s get this clear: Your writing won’t bring you money because of these tools.

Sitting down to write will make your writing better. With quantity comes quality, my writing coach continues used to say. And she was right.

I wrote my first Medium article on March 27. Since then, I have published 55 pieces with a >80% curation rate. In August, I earned $4,167 on Medium alone.

Screenshot by Author

And while these tools won’t turn you into a professional writer, they will level up your writing process.

Whether you’re struggling with headlines, keeping a writing routine, or are non-native speakers, these priceless tools will help.


1 Manage Your Articles With Trello

Trello is an idea keeper, a writing tracker, and a motivation booster. Here’s how I use my Trello Board, from left to right:

  • Medium Article Ideas
  • Working Projects
  • Articles Submitted to Publications
  • Articles Rejected by Publications that need Reediting
  • Articles Published

When to use it:

Your Trello board will be useful on five occasions.

  1. When an idea strikes you. Add the title or the idea as a new card to your very left corner. You can also access it from mobile. Write down everything that comes to your mind.
  2. When you start writing. Because of all the article ideas on your board, you’ll never have to worry about a blank page in front of you. When you start a new story, pick one of your ideas, drag them to the “Working Projects” column, and start writing.
  3. When you hit publish. This is a motivational booster. It feels great to move a working project card to the “articles submitted” column. In the card add a date when you expect to hear back. Thereby, you’ll see when you need to follow-up or submit your piece to another publication.
  4. When the publication publishes or rejects your piece. Being rejected is part of every writer’s journey. Move your card to “rejected” and improve your piece. Then, give it a new shot at another publication.
  5. When a publication publishes your piece. Boom! You’ll move your card from “submitted to publication” to “published.”
Screenshot by Author

2 Improve Your Headlines with Co-Schedule

Most writers ignore this fact. They write great content and bad headlines. Yet, readers will never read your writing if your headline isn’t catchy.

Nobody will read your article if your headline sucks.

I ignored this fact until I completed Benjamin Hardy, PhD’s online course writing course. He takes 20–30 minutes every time he writes an article. He’d jot down 10–30 headlines before he starts to write.

Headline writing is a craft. It leaves the reader asking questions and wanting more.

Headlines consist of a combination of words. And while there are great articles on headline hacks, this tool does a quick check-up for you.

When to use it:

Opinions vary on this one. I love to find the headline before I start writing. It’ll help me frame my idea in various contexts. Moreover, a clear headline will help you structure the content.

Screenshot by Author

3 Format Your Headlines With Title Case Converter

After you mastered the balancing act of crafting a headline that grabs the reader’s attention, you’ll want to format it. Many publications reject articles because of their first impression.

When to use it:

I use Title Case Converter before I paste the headline into my story.

Screenshot by Author

4 Look Beyond Unsplash Pictures

After you’ve leveled up your writing with a great and proper formatted headline, you want to make sure you choose an awesome picture.

Search images by emotions instead of keywords. Pick a picture that supports the feeling you’re trying to convey. Tim Denning is an incredible picture picker.

When you analyze his images, you’ll see he searches beyond Medium’s built-in Unsplash feature. Here’s a list of links to free high-quality stock images:

  • Pexels
  • StockSnap
  • Reshot
  • Pixabay
  • Flickr
  • Freepik
  • Burst

When to use it:

After you set and formatted the headline, and before you start writing.


5 Use A Leftover Graveyard To Edit Without Mercy

Excellent writing requires ruthless editing. A leftover graveyard is a simple tool for producing clear, dense, and solid writing.

It’s a simple text document containing every phrase that wasn’t good enough to remain in your piece but was too beautiful to be deleted.

With every passage, ask yourself: Does this add value for the reader?

If the answer is yes, keep what you wrote. If the answer is nay, move sections or words to your graveyard. Every time you doubt whether you should delete a sentence, cut the sentence out, and paste it into your leftover document.

When to use it:

When you do the editing after you’ve written your article.

Screenshot by Author

6 Engage Your Reader With Thesaurus

If you’re also a non-native English speaker, a synonym finder is a pure piece of gold. It’ll find words outside of your vocabulary and give you suggestions on how to use them.

By adding variety to your writing, you’ll make your texts more interesting.

When to use it:

I use it at the same time as the leftover graveyard. In my first round of editing, I’d cut out everything that’s not needed and look for words that make the writing better.

Screenshot by Author

7 Run a Health Check With Grammarly

Grammarly has gained a lot of popularity within the last year. And it’s well-deserved. This writing tool checks your writing for grammar and punctuation mistakes.

And, in the pro-version, it also offers suggestions on how to replace your words.

Yet, don’t let Grammarly ruin your copy. It’ll sometimes be very strict on suggestions and make you want to reach the 99, even though a 78 score might be more authentic and humane.

When to use it:

To ensure it’ll not change your message, only use it after your round of self-editing. A grammar health check will give your piece the final touch.

Screenshot by Author

8 Do A Second Audit With The Hemmingway App

Even though I love Grammarly, it’s not perfect. So anytime I submit a piece, I’d make it run through the Hemingway App and look for phrases that are very hard to read.

Most of the times, the very hard to read phrases contain some logical errors. I’ll try to split them into two sentences or change the overall structure.

By focusing on clear, logical writing throughout your entire article, you’ll attract more readers, and, after all, take your writing to the next level.

When to use it:

After you’ve run your writing through Grammarly and before you hit publish.

Screenshot by Author

9 Analyze Your Articles With an Excel Sheet

I first learned about this sheet in Sinem’s Medium Writing Academy. It’s a self-made excel sheet you can use after you publish your article. It serves as an analyzer and a motivator.

This sheet helps you to do more of what works well. Moreover, this system helps you keep track of the number of articles published, your curation tags, and the publications you’ve published with. You can use your sheet to set your writing KPIs.

When to use it:

Once a publication published your piece add all the details to the sheet. Once a month, add the stats and the numbers.

Screenshot by Author

Filed Under: ✍🏽 Online Creators Tagged With: Medium, Tools, Writing

How a Leftover Graveyard Will Make You Edit Without Mercy

September 7, 2020 by Eva Keiffenheim


A simple tool for producing clear, dense, and solid writing.

Photo by Anna-Louise from Pexels

The first draft of anything is always shit, Hemingway used to say. And as a writer, your own experience will attest to the quote’s truth.

You know you need to be a merciless editor to get the best out of your articles. To seduce your readers, you need to distill the quintessence of your writing.

Yet, most of us are lousy editors. We’d rather clinch to the clutter in our pieces than deleting parts of our creations.

Humans avoid pain, so it’s natural we desist editing. It hurts. Deleting the words you carefully put on the paper feels like cycling backward.

There are two options to ease the ache. You‘re either fortunate enough to afford an editor or using a leftover graveyard.

I used the latter for my past 39 Medium articles. 35 were curated and resulted in over $4k Medium Partner Program income in August alone.

And as I feel much of the article’s performance is attributed to my leftover graveyard, I want to share this simple tool with you.

In the following lines, you’ll learn what it is and how you can set up your own.

What is a Leftover Graveyard

A leftover graveyard is a fancy name for a simple text document. It’s an archive containing every phrase that wasn’t good enough to remain in your piece but was too beautiful to be deleted.

A leftover graveyard’s sole purpose is to store all words and sentences you’re hesitant to delete. You cut out all fluff from your original piece and bury it in your graveyard. You’ll remove all the clutter as all your semi-rare sentences move to the document. Thereby, your leftover graveyard will make your writing more clear, dense, and solid.

It’s a psychological trick. You delete your words without deleting them forever. In case you miss your words or want to reuse them for other articles, you know where to find them.

I started with one big graveyard, but as I love to scroll through the graveyard’s to find inspiration, I split them into three different ones. I have one for business, one for love, and one for education.

Pictured by Author

How to Set Up A Leftover Graveyard

You don’t need any fancy tools to make your own one. All you need is a simple text document. I use a google sheet because the cloud makes it accessible from anywhere.

Here’s how my business graveyard looks from inside the document. You see sentence fragments that I cut off from writing a piece on spending less time on your phone.

Pictured by Author

Once you have the document set up, you’re ready to use it for your editing process.

How to Use It to Edit without Mercy

Your editing graveyard will fill with your first round of editing. That’s when you’ll start to burry your words. Every time you go over a written piece to improve it, open your leftover graveyard.

With every passage, ask yourself: Does this add value for the reader?

If the answer is yes, keep what you wrote. If the answer is nay, move sections or words to your graveyard. Every time you doubt whether you should delete a sentence, cut the sentence out, and paste it into your leftover document.

In case you miss the cutout part, you’ll be able to copy it back to your text anytime. When you feel something should be added, revisit your graveyard and take back sentences that add value for your readers.

Moreover, you can use this graveyard as inspiration when you’re crafting a new piece. I love to scroll through my leftover graveyard from time to add article ideas to my Trello board or to reuse sentence structures I haven’t used so far.

Final Words

Excellent writing requires ruthless editing. Using a leftover graveyard has helped me to make a full-time income from my writing. If that’s your goal, I hope this simple trick does the same for you.

By editing with a leftover graveyard, you’ll have the quintessence left. Your readers will want to read your articles until the end. Your writing, your rules. Use whatever works for you. Ultimately, you determine which process elevates your written words.


Do you want to stay in touch? Join my E-Mail List.

Filed Under: ✍🏽 Online Creators Tagged With: Editing, Writing

7 Lessons from Silicon Valley Legend Ben Horowitz Every Entrepreneur Should Know

July 22, 2020 by Eva Keiffenheim


On management, culture, responsibility and so much more.

Photo by Austin Distel on Unsplash

I sighed when a fellow founder recommended I read Ben Horowitz’s The Hard Thing About Hard Things. I thought it’d be another book full of theoretical self-help fluff from a person who has never done what he is preaching.

Turns out I was wrong.

Horowitz’s book is a management bible for growing any company. I wish I’d read this book before founding my first business. His advice would have saved me from making costly mistakes.

Here are the top seven lessons from his book with instructive examples on how to apply them.

Don’t Protect Others by Whitewashing Facts.

It’s in our human nature to protect people who depend on us. This behavior is helpful when raising a child. Yet, it might be counterproductive for startup management.

I fell into the protection trap early in my entrepreneurial career. Back then, I conducted the user tests for our new app. We didn’t follow the Lean Startup approach. The product was ready. But our potential customers weren’t.

I listened to harsh criticism. Testers did neither understand the app’s navigation nor find the functionalities they were looking for.

Yet, I felt the urge to protect our CTO. I used positive framing to sugarcoat the negative feedback. I thought he couldn’t handle the hard truth.

By keeping the hardest feedback to myself, I prevented the product team from building a better application.

When you don’t share the hardest obstacles, your people can’t build a better business.

Horowitz advises us to be brutally honest with our employees. Honest conversations lead to trust. Besides, the more people are aware of hard obstacles, the more brains can start building solutions.

“In any human interaction, the required amount of communication is inversely proportional to the level of trust.”

How to apply this lesson:

Share everything you know about a challenging situation. Be both brutally honest and transparent. Don’t whitewash facts.

When you share uncomfortable facts, tell your team you have the company’s goals in mind. Growth is about tackling the hardest parts.


Always Put Your People First.

With investors in the neck, it’s tempting to prioritize profits over people — particularly when things don’t go well. When your ship might sink, you might go over lives to protect it from going down.

Yet, we should never lose sight of our moral compass. When Horowitz’s company was fighting for life and death, he still focused on what mattered. He put people first.

He was between sign and close of company saving acquisition talks. John Nelli, former CFO, would not have transferred to the new company. Meanwhile, he was diagnosed with cancer.

From a profit perspective, Ben should’ve stuck to the initial plan and let John go. He didn’t owe his CFO anything. Yet, he accepted the healthcare costs and thereby prevented John’s family from bankruptcy.

This lesson teaches us to always focus on what matters in life. You should always put people first. Thereby, you’ll not only stick to your moral compass and do good in the world but also create loyal employees as they know they can trust you.

“Take care of the people, the products, and the profits — in that order.”

How to apply this lesson:

Listen to your people with open ears and open hearts. Be generous with your words and actions. Care for your employees’ families and show understanding when anyone is facing tough family circumstances. In this way, you create a company culture of loyalty and trust.


Look for Things You’re Not Doing.

You defined and communicated your vision to your team. Your people know their KPIs and focus on execution. The entire team is on track, and you’re working hard.

Your business might be so focused that you overlook one important thing, and you no longer see the wood for the trees.

To avoid this common issue, Horowitz suggests asking one powerful question. This question invites out-of-the-box thinking and keeps different perspectives involved.

In every meeting, he’d ask: What are we not doing?

“Ordinarily in a staff meeting, you spend lots of time reviewing, evaluating, and improving all of the things that you do: build products, sell products, support customers, hire employees and the like. Sometimes, however, the things you’re not doing are the things you should actually be focused on.”

How to apply this lesson:

Make it a habit to ask in every meeting, “What are we not doing?”. You’ll shed light on the necessary tasks.

By asking this question, you’ll give your team a creative thinking space. To involve all meeting members, ask them to write down their ideas. Then, do a quick round of sharing all thoughts.

When you find different people giving similar answers, you know what should move on your list.


Create a Culture That Enables Free Information Flow.

According to Horowitz, free information flow is critical for the health of your business. It’ll allow you to learn about negative news before it’s too late.

Yet, many company cultures discourage the spread of bad news, so the knowledge lay dormant until it was too late to act. By being judgy or nurturing fixed mindsets where mistakes are viewed as failures, employees won’t share bad news.

Create a culture that encourages openness and sharing struggles and challenges. Your feedback system shouldn’t punish employees for getting obstacles into the open.

“A healthy company culture encourages people to share bad news.”

How to apply this lesson:

Thank your colleagues for sharing difficult things. Avoid choleric reactions. Be okay with people revealing a problem without offering a solution.

Show gratitude when an employee tells you something you don’t want to hear. Remember, it’s better to know about critical turning points too early than too late.


Don’t Put It All on Your Shoulders.

As a founder or CEO, you feel like you must know it all. You think you should have a solution to any problem. Yet, this thinking is flawed and will harm your business.

By taking too much responsibility on your shoulders, you restrain your people from problem-solving.

Instead of keeping the hard things for yourself, allow your team to join you in brainstorming for solutions. Give the challenge to people who can not only fix the issue but who are also intrinsically motivated to do so.

“You won’t be able to share every burden, but share every burden that you can. Get the maximum number of brains on the problems even if the problems represent existential threats.”

How to apply this lesson:

Call an all-hands and tell your employees what’s the block in front of you. Share the problem with all details and then get the team mastering to build a solution that can help your business.

That’s why you hired your team first — making your company win. By not putting it all on your shoulders, you empower your team.


Take Action on Negative Indicators.

When I learned our new users grew by 38 percent beyond the average growth rate, I strategized about the next growth steps.

Who would we hire next? Should we increase our budget for marketing campaigns? I jumped into taking action.

Entrepreneurs have a bias for taking action on positive news. We love to act on promising information such as unexpected customer growth.

On the other hand, when things don’t go as planned, we tend to blame it on the rain. We find alternative explanations for the bad results and wait it out instead of taking action.

“Almost every CEO takes action on the positive indicators but only looks for alternative explanations on the negative leading indicator.”

How to apply this lesson:

When one of your teams didn’t reach their KPIs, don’t sit it out. Instead, focus on figuring out what happened and how you can improve it for the time to come.

Which numbers or people can give you a detailed explanation about what happened? What should your team be doing differently to overcome this obstacle the next month? Take action on negative indicators.


Set Up Employee Training Structures.

When I suggested my co-founder, we set up a training program; she replied, “There are so many decisions to make, customers to win, products to improve that we can’t prioritize training right now.”

Many founders argue that putting a training program in place will take too much time.

Yet, no investment will yield to higher interest rates than investing in your people. Training will improve productivity in your company.

Moreover, when your best people share their most developed skills, your company culture will improve more than with any team-building event.

“Being too busy to train is the moral equivalent of being too hungry to eat.”

How to apply this lesson:

Teach a course yourself, for example, on management expectations. Select the best people on your team to teach other courses. Make training mandatory.

Horowitz suggests teaching can also become a badge of honor for employees who achieve an elite level of competence.


Moving Forward

As with all business advice, pick the lessons that apply to your situation. Focus on the principles that make a difference in your company.

  • Be brutally honest about hard things.
  • Always put your people first.
  • Regularly ask, “What are we not doing?”
  • Embrace the free information flow.
  • Share your burdens with your team.
  • Take action on negative indicators.

Without application and action, the best business lessons are worthless.

If you, however, apply one principle at a time, you’ll realize how these small decisions accumulate and lead to changes in your company.

Now the only question is: Are you ready to do the work?


Do you want to stay in touch? Join my E-Mail List.

Filed Under: ✍🏽 Online Creators Tagged With: advice, Books

19 Things I Learned About Writing From My $699 Medium Coach

June 15, 2020 by Eva Keiffenheim


90 hours of coaching broken down into 7 mins for you

Photo by KOBU Agency on Unsplash

Benjamin Franklin once said,

“An investment in knowledge always pays the best interest.”

This spring, I followed the advice and invested $699 in a medium coaching program. Until April, I hadn’t written anything except for 150 pages of academia and 1350 pages in my bullet journals. Since April, I’ve published 16 articles on medium and filed the resignation for my 9–5 job.

Here are 19 essential lessons I’ve learned about writing from my professional medium coach, and Benjamin Hardy, PhD’s online writing course:


1. If you’re a new writer, focus on white space

The less experienced you’re with writing, the more white space you’ll need. Section breaks, paragraphs, and subtitles help you deliver your message.

My first articles are living proof that white space works. I published this article before my first coaching session and this one after it. To this date, the first article earned 9$, the second 127$. These numbers show my medium coach was right about the importance of white space.

Reserve your longer paragraphs for the time you found your writing voice. Gary Provost, a famous American author, once demonstrated how to write longer passages that sound like music:

This sentence has five words. Here are five more words. Five-word sentences are fine. But several together become monotonous. Listen to what is happening. The writing is getting boring. The sound of it drones. It’s like a stuck record. The ear demands some variety. Now listen. I vary the sentence length, and I create music. Music. The writing sings. It has a pleasant rhythm, a lilt, a harmony. I use short sentences. And I use sentences of medium length. And sometimes, when I am certain the reader is rested, I will engage him with a sentence of considerable length, a sentence that burns with energy and builds with all the impetus of a crescendo, the roll of the drums, the crash of the cymbals–sounds that say, “Listen to this, it is important.”


2. Publish 100 articles before you expect anything

A writing career isn’t linear. In the beginning, while you’re learning the craft, don’t expect to earn anything. As with everything in life, there’s no such thing as an overnight success.

Making a living from writing is the result of hard work. Authors earning >2000$ on medium or other platforms have spent months practicing.

You can reach writing success as well if you’re willing to put in the work.

Most writers lose faith in their abilities before reaching exponential growth. Following my coach’s advice, I committed to publishing 100 articles before expecting any return on my time investment.


3. The only way to improve your writing is by writing

The only way to get better in writing is to sit down and write. Thinking about writing, speaking about writing, and reading about writing won’t be nearly as effective as writing.

Once my coach asked me the following question, and my writing practice changed:

Do you know there’s a difference between creation and consumption time?

While consuming is all about reading and learning, creating is the process of putting words on paper.

Here’s how I track writing vs. consuming time. Tracking helps me to find a balance between learning and writing.

Image By Author

4. Writing quality will improve with writing quantity

The quality of your words will increase with practice. Instead of editing yourself a fourth time, focus on producing more content.

As an economist, I’d label it as the diminishing return of editing: The longer you edit one article, the later you start a new one.

Ben Hardy explained it’s better to publish a lousy piece than not publish at all. Some of the articles he resisted to publish, went viral afterward.

Unless you stop editing a piece and spend your time on writing a new one, you don’t create. Don’t be too critical on yourself and identify perfectionism as another form of procrastination.

Publish before you think your piece is perfect. Writing quality will improve with quantity.


5. Build a daily writing/creating habit

To write a lot, you need a writing routine. While plenty of articles tout specific writing routines, you know best what works for you.

I get up at 6 AM, practice yoga, journal and meditate. At 6:40 AM, I start writing. By 9 AM, I’ve done all of my creative work and ride to work.

It doesn’t matter which routine you decide on, as long as you stick to the habit. Or, as Austin Kleon puts it:

“What your daily routine consists of is not that important. What’s important is that the routine exists. Cobble together your own routine, stick to it most days, break from it once in a while for fun, and modify it as necessary.”

Ask yourself,

When can you make time to write and focus without distraction?

What helps you getting into your creative state?


6. Always ask, “What’s in it for my readers?”

I felt incredibly proud to publish my first pieces. But my mentor made me realize my articles equaled personal journal entries. She asked:

Do you write for yourself, or do you write for your readers?

One should never write without your readers in mind. Here are some helpful questions, both from my mentor and the medium curation guidelines:

What’s in it for your readers?

Is your piece written for the reader?

Does this add value for the reader?

What do you want your readers to take away?

Which feelings do you aim to provoke?


7. Headlines make or break your stories success

Headlines are the entryway for your readers. If your headline doesn’t spark your readers’ interest, they won’t bother to read the first lines of your well-crafted introduction.

Benjamin Hardy jots down 10–20 headline versions for each of his pieces before he determines the best one. I follow this advice by spending 20 minutes on brainstorming headlines. Being strategic about headlines helps you reach more readers.


8. Check headlines, instead of your stats

My coach caught me on the spot with this one. Here’s what she said:

“The first times you get curated and published with bigger publications, it’s tempting to check your stats again and again. Especially if one article got published in a publication.

But instead of reviewing your cents trickling down, use your time wisely and study successful writer’s headline.”

Instead of checking your stats, study virality. Look at successful writer’s headlines, like Jessica Wildfire, Niklas Göke, Kris Gage, Liz Huber, and Tim Denning.


9. Combine logical with emotional writing

Before mentoring, I thought the number of high-quality sources lead to popularity. It turns out I’m wrong.

The combination of head and heart knowledge makes a story unique.

I come from academia, and it’s easy for me to combine other writer’s logic and craft a coherent story. However, when you look at best-performing articles on medium (like this one, this one, or this one), you’ll realize they don’t sound like peer-reviewed papers. Readers aren’t looking for pure facts.

Instead, it’s your personal experience, combined with a touch of logic, that speaks to your reader’s heart and triggers reactions. To start an article, my coach asked me the following helping questions:

What are the things you can’t stop thinking about?

What are you excited, angry, upset or inspired about?

Which difficult experience did you encounter and what helped you to overcome this?


10. Search images by emotions, instead of keywords

Choose a picture that supports the emotional message you’re trying to convey. Your answers to the questions above offer a great starting point for image search.

In the beginning, I used my pictures and searched at other platforms for the perfect image. But top medium stories demonstrate, in most cases, the built-in Unsplash image search is enough. While crafting your article, click on the + symbol and select the loupe. Then type in your emotion-triggering keyword.

Image By Author

11. Structure your article bones to write faster

Working for days on the same piece can leave you frustrated. Particularly, if you can’t see any progress. For writing development, Ben Hardy’s practice helped me the most. It might help you as well if you tend to get lost in your writing process. Here’s what he said:

“Always start with the headlines, then get all of the subsections.

Once you’ve got the subsections title them in powerful ways.

Once you’ve got the subsections titled, get quotes for each subsection or other essential elements you need.

Once you have these bones formed, begin writing.”


12. When you write, — write

Once you have the bones formed, focus on writing. When you stop for research or edit yourself, you break your flow state.

Focus on putting words on the paper. Don’t stop your flow. Don’t look for more knowledge. Use abbreviations for flowing through your craft.

  • LINK if you want to link something later on write
  • CHECK if you need to double-check what you’ve just written use
  • IMG in case you want to add an image or graphic

Editing and researching interrupt your flow state. Add all of the above once you’re done with the first draft of your piece. When you write, just write.


13. When you don’t feel like writing, write

As said in the beginning, writing quality improves with quantity. Hence, you need to write consistently. When you don’t write, you don’t produce content. You don’t learn. You don’t improve.

Create environments that help you to write. In case you don’t know how to focus without distraction, no matter what, read Cal Newport’s Deep Work. If you only have a limited amount of time for writing, focus on smaller tasks like researching headlines, images, or coming up with new ideas.

On days, where you don’t feel like writing, try to compose the worst piece you can. It’ll make your process more fun.


14. Bury mediocre passages in your editing graveyard

Editing can hurt. Deleting entire phrases might feel like going backward. But to craft excellent writing, you should edit without compromise. Mediocre sentences will ultimately lead to average articles. Not every word you typed deserves to stay in your piece.

A document that serves as editing graveyard can help. This document has the sole purpose of editing more strictly and not clunch to useless words. You cut out all fluff from your original piece and bury it in your paper. In case you miss your words or want to reuse them for other articles, you know where to find them.

If you’re unsure whether to keep or destroy a passage, read the entire paragraph out loud. Your voice is a great editing tool after you’ve written your piece.


15. Use a system to manage your ideas and articles

The more you write, the more critical it is to keep an overview. Inspired by my medium coach, I use Trello for ideas and article management. Here’s how I use Trello:

Image By Author

In the column “ideas,” I store all headline and topic ideas. I prefill most idea cards with an outline and the described bones structure. Prefilled content helps to get into writing quickly. You no longer have to sit and wait in front of a blank piece of paper, waiting for ideas to cross your mind.

Once I started putting an idea onto paper, the Trello card moves to “working projects.” Some longer articles, like this one, linger around in “working projects” for a few days as I add ideas to the piece in several writing sessions.

When I finished editing the article and found both the headline and an emotion-provoking picture, I submit the article to a publication. In the “submitted to publication” column is a timestamp on every card that indicates when I expect to hear back from the publication.

In case publications rejected my article, I move the card to the “re-edit” column as my work needs further improvement. If a publication publishes my piece, I slide the card to “published.”

All articles in the “published” column receive an entry in my article overview sheet, which looks like this:

Image By Author

This excel sheet is a great motivator for reminding you of the work you’ve completed. Moreover, this system helps you keep track of the number of articles published, your curation tags, and the publications you’ve published with. You can use your sheet to set your writing KPIs.

What indicates your on track in your writing process?

Do you measure your success by the number of articles you published?

By the words, you’ve put on paper?

Is it the total reading time in minutes, that shows your effort?

Or is it the variety of publications you’re looking for?

Be clear about your key performance indicators. The clearer your goals, the easier it’ll be to reach them.


16. Publish with publications to reach more readers

Instead of self-publishing my first articles, I should’ve spent more time researching suitable publications. Here are the three benefits of publishing with publications:

  • You reach more people
  • By following publication guidelines, your writing improves
  • Thereby, your chances of curation increase

Once you’ve written and edited your piece, research suitable publications, there are medium run publications like Onezero, Elemental, Gen, Zora, Forge and Human Parts, and prominent other publications like P.S. I love you, The Startup, The Ascent, or like this one The Writing Cooperative. If you’re unsure which publication might suit your writing, use medium’s search for your topic. Look which publications recently covered your area of expertise.

Don’t feel discouraged in case publications reject your piece. I applied three times for The Ascent before they accepted one of my articles. See the application process as a free learning opportunity; if editors reject your work, ask yourself how to improve your writing. Ask for feedback and use the publication guidelines to double-check.


17. Done is better than perfect

As a writer, you put your name behind everything you publish. I asked my coach several times how she determines a piece is “good enough.”

Instead of looking for the perfect breakthrough, give your best to produce as much useful content as you possibly can. You have to accept your okayish content if you want to become an exceptional writer.

Don’t overjudge your work and don’t fear to publish something that isn’t perfect. Once you’ve hit publish, you can let your fears go and focus on your next idea.

In retrospect, I wasted my time editing this article for 8 hours. I would’ve used my time better by posting earlier and creating more content.

Done is better than perfect. Hit “publish” once your piece is good enough.


18. Learn to write faster

Megan Holstein said in one of her inspiring articles on writing,

“Every writer’s business is a factory. We can choose to produce a better product, or we can choose to produce more of it. The more writing we put out to the world, the more readers might stumble across our writing.”

By publishing more than 30 pieces a month, my medium coach puts these words into action. Thereby, she earns more than most people I know. Moreover, with quantity comes quality. When you improve your writing speed, your writing quality improves likewise.

To increase my writing speed, I track the time I need to write an article. While this doesn’t sound highly creative, it helps me to keep my goal in mind and to focus on the process.


19. Ideas are everywhere

Whatever idea comes to your mind, be sure to capture it in your idea management board or a journal, so you don’t lose it. Ideas come best when you don’t aim to have them.

Here are some great prompts from my mentor, that helped me getting ideas:

Which stories can you tell from your life?

What’s interesting about your career?

Which resources have helped you in your daily life? How?

Which book have you read that triggered something in you?

What topic are you currently struggling with?

Which vulnerability do you dare to share?

Write about something you care about and be brutally honest about it.

Feel free to try anything you like, whether it’s investments one day and relationships the next. People follow you for your voice, rather than expertise on any given topic.

And whenever you lack ideas, check out Bookshlf to get inspired by academics, distinguished professionals, journalists, and online creators.


Want to join a life-long learning community? Sign up here for applicable insights on reading, learning, and growth.

Filed Under: ✍🏽 Online Creators Tagged With: Writing

What Every Entrepreneur Should Know About SEO

May 2, 2020 by Eva Keiffenheim


The only step-by-step guide you need to succeed in SEO

Photo by NordWood Themes on Unsplash

Sales funnels, social media strategies, email marketing…these are only a few of the things any digital entrepreneur has to understand and apply.

As someone who has worked with several digital businesses, I know how overwhelming all of this can feel.

Unfortunately, I can’t provide a solution to all these areas, but after reading this post, you’ll be able to cover one of the essential areas of any digital business: SEO.

Setting up a website is easier than ever before, but how do you ensure people find your work?

SEO is the most effective way so that people really find your website.

You probably read articles on keyword research, backlink strategies, and H1 tags before and you might be aware of the importance of SEO, but how do you put all of this into action?

“A website without SEO is like a car with no gas.”

— Paul Cookson

WordPress.org was the CMS of choice for the websites I created. In retrospect, I can also recommend wordpress.org from an SEO perspective as there are great plugins and resources.

SEO is significant leverage to increase your visibility in the online space.

SEO can help yoga teachers, product owners, company co-founders, dentists, etc. — anyone who owns a website. Important message first: you do not need to have coding skills. Let’s take a deep dive into the three significant areas of SEO.


On-Page SEO

On-Page SEO is everything you do on your website. More specifically, on-page SEO contains Keyword Research, Content Strategy, and SEO Copywriting.

On-Page SEO is one of the three pillars of SEO (Source: Eva Keiffenheim).

Keyword research

Keyword research is the most important part of On-Page SEO. Unfortunately, I did not take this seriously two years ago and wrote my first blog articles before doing keyword research. By skipping the research step, my pieces were, from an SEO perspective, useless.

Without proper keyword research, you optimize for words that don’t help you advance your business or product. Here’s how to do proper keyword research so that you don’t waste as much time as I did.

First, consider your company’s mission and your audience before diving into the technical part of keyword research.

What is your unique selling proposition? How does your service/product enhance your visitors’ /companies’ lives?

Then, through the eyes of your visitors, think about which search terms users should find you for. Consider that your visitors do not look for technical terms.

An ugly but substantial truth upfront: the best SEO in the world won’t improve a shitty product or low-quality content. In case you are unsure about your product or service — use your website to ask for feedback and learn from potential customers instead of reading this SEO guide.

After doing proper keyword research, my final result looked like this table. I used a google sheet to prioritize my keywords (feel free to duplicate the research template to your cloud):

My Keyword Research Sheet (Source: Own Sheet based on Yoast SEO Academy)

Here’s how I filled each column with content and how you can master your keyword research, too.

For the first four columns:

  • Start with brainstorming all keywords that come to your mind and use the free tool “answer the public” for finding questions users ask related to your search term. Brainstorm at least four to five main groups for the first column.
  • Find related keywords to your main groups based on google search with Yoast google suggest expander
  • Look for keyword suggestions and keyword’s rank and search volume with ubersuggest by Neil Patel
  • Compare the search volume for different keywords over time and region with Google Trends and fill in the column “traffic potential.” Note that this is no exact number, but your best guess.

As I had new websites with a domain authority lower than 5, I aimed for mid to long-tail keywords. A mid-tail keyword would be “Yoga Studio Vienna” and a long-tail keyword “Ashtanga Yoga Studio next to Vienna University.” Long-tail keywords contain 4–6 content words and are therefore more specific. You reach a more targeted audience, while the search volume (people that type this word combination into google) is lower.

“In SEO the keyword length matters because, at least in the beginning, we’re going to go after long tail keywords — very exact, intention-driven keywords with lower competition that we know can win, then gradually we’ll work our way to the shorter keywords .”

— Austen Allred

For me, focusing on long-tail keywords also made sense from the conversion potential. People who google “Yoga Vienna Mysore Style in 9th district” are more likely to become my customers than people who google “Yoga.”

You also notice in the excel file that I scored “chance for conversion” higher for long-tail keywords.

Lastly, make a good guess on your chance to rank in the top three.

Ranking in the top three means that google displays your site in the first three organic results for your specific keyword. Score your chance by researching what the three best ranking sites for your particular keywords are doing.

For ranking research, open an incognito window to research. With the tool “I search from,” you can access google from any location.

Do you have content that’s better than the current top 3? Do the current top 3 have a low domain authority? Great. This keyword is your chance to rank.

After you identified your top 5 keywords, check the competition that is ranking best for those keywords, and make better and more relevant content than they do. Here’s how.


Content Strategy and Content Creation

Before you determine a specific content topic, think about the search intent (=what are your visitors looking to find on your site).

Do your visitors want to buy something? Are your visitors looking for information? Do visitors come to your site for educational purposes? Each page you create should exist for one search intent.

Here’s what your website’s content pieces can do:

  • you can demonstrate competence (case studies, industry updates, awards, lengthy testimonials from previous buyers)
  • create consciousness about what you do (product pages, service descriptions)
  • develop a sense of belonging (behind the scenes & team, company culture, philosophy on things)

Great! Once the search intent is clear, you can focus on creating content. If you already have ideas on content, you can skip the next paragraph as it shows you how to come up with content ideas.

As the Content Idea Generator, Google Analytics is a great tool. However, the best way is to ask your target audience about their interests.

You can also follow relevant hashtags on social media. Here are my favorite hacks for content creation:

  • Find the content that performs best with buzzsumo
  • Monitor new web content with Google Alerts
  • Research the trending topics of the world with Google Trends
  • Type in the first idea of your keyword and look at the sentences google suggests

Are you clear about the content you want to cover? Great, let’s continue with actually composing the content.


SEO Copywriting

Your blog posts are SEO Copywriting. I had to fail before realizing that SEO Copywriting is nothing similar to journaling or blogging.

In SEO Copywriting, your keywords come into life.

If you do not have the time (but the money) to outsource, take a look at SEO copywriters on Fiverr. I am a big fan of the YOAST plugin as it monitors your post’s quality and gives actionable advice on what to change.

Here is a checklist for single blog posts and SEO quality:

  • Good readability — active voice, alternating sentence beginnings, transition words. For English texts, the free online writing assistant Grammarly can help.
  • Keyphrase length — the optimum is up to 4 content words (e.g., Ashtanga Yoga Class in Vienna)
  • Keyphrase in the slug, title, and subheadings — you should have your focus keyphrase of your article in your URL, in the <H1> title tag and your <H2> or <H3> tags
  • The proper length of your piece — For a regular post it should be >300 words and for cornerstone content >900 words
  • The adequate length and content of your meta description — between 120 and 156 characters with your key phrase in it, use an active voice with an actionable call to action
  • Keyphrase density — 0.5%–3% is the optimal density, you can also include synonyms
  • Images alt attribute — include your keyphrase in the image descriptions in your blog post
  • Outbound and internal contextual links — your article should link to other relevant websites and also to other related sites on your page (follow or nofolllow). By building an internal linking structure, you show Google which of your pages are most important.

Before jumping to the (easier) part, one mistake I want you to prevent making: NEVER optimize different articles for one keyword. Otherwise, you are competing against yourself.


Technical SEO

Technical SEO improves your site in such a way that search engine spiders can crawl your website and index your content in their search results.

Technical SEO is one of the three pillars of SEO (Source: Eva Keiffenheim).

If you are already familiar with the terms “crawling, indexing and spiders” you can skip this 5-minute video.

The technical side is my favorite SEO part because you can work through a list step by step. In case you are wondering who determines the importance of each factor, take a look at Google’s search quality evaluator guidelines (Dec 2019).

If your time is better spent on other tasks and you have the financial resources, hire a Technical SEO freelancer on Fiverr. The following checklist can still help you determine which specific tasks to look for.


Page Speed Optimization

Page Speed matters. Check your current page speed with GTMetrix or with Googles Page Speed Insights.

Both metrics give you tailored advice on how to improve your page speed. The easy fix is the proper size of your web images (I reduced my image sizes with tiny png.)

As a rule of thumb, a picture should never exceed the size of 200kb. There are also plug-ins for image auto-optimization, but in my experience, the manual adjustment works better.

In addition to image optimization, use a caching plugin (I used and liked wp fastest cash).

On a side note: FB Pixel or Hotjar can make your page slower. Only enable both when you are testing and analyzing something. Otherwise, consider switching them off.

Mobile Optimization

The Google search algorithm strongly favors sites that are optimized for mobile devices. Most WordPress themes are mobile responsive.

Nevertheless, always make sure that the mobile content is displayed correctly.

For exploring your site’s mobile-friendliness, you can use the google chrome built-in testing tool to view your content from different devices. Here’s a video that explains how.

Repetitive Technical To Do’s on Your Site

  • Use Tags for Hierarchy <H1> <H2> <H3> — only one H1 Tag per site (check source code on every single site)
  • Use Meta Title Tags (e.g., check with this free tracker from SEObility where your site needs improvement).
  • All URLs should be human-readable and contain keywords. Remove stopwords (such as “a” or “and”) from your permalinks.
  • Alt descriptions of images. The alt description is the text that appears in place of an image on a webpage if the image fails to load on a user’s screen.
  • Have clear path navigation visible on your site. Breadcrumbs show your visitors how the current page fits into the larger structure of your website and allow them to navigate. Moreover, Breadcrumbs allows google search to determine the structure of your site more easily. Add Breadcrumbs with the help of a Breadcrumb Plugin.
  • HTTP Status Codes. Check for 404 errors in Google Search Console at Crawl errors. Google Search penalizes sites with many errors, as this can be a sign of bad maintenance. 301 redirects can help in solving this issue.
  • Use Structured Data in your sites. Here’s an SEO’s guide to writing structured Data. Alternatively, Schema&Structured Data is a helpful plugin for WordPress Sites.

Crawlability

The crawlability determines whether search engine bots (like Google’s crawling spiders) can discover your site.

If your site is not crawlable, bots can not find it, and not list it in search results. Here’s how you make your sites crawlable and your On-Page SEO worth your work:

  • Submit your XML.sitemap via the Google Search Console (Here’s how to submit it).
  • Check whether your site has duplicate content that needs removal. If duplicate content is necessary, make use of canonical links and the robots.txt to avoid problems.
  • robots.txt file tells search engine bots where they can or cannot visit your site. For example, you do not want your audience to find your checkout page in the search results. The official syntax of the robots tag is: <meta name=”robots” content =”value”> The most common robots value are index, noindex, follow and nofollow

Off-Page SEO

Off-Page SEO is everything you do away from your website that brings traffic to your site.

This part of SEO is about so-called “inbound links” from other websites to your site.

The higher the domain authority (=trustworthyness and relevance on the internet) of sites that refer to your site, the more valuable is such a link for you. Links from high authority domains to your site tell the search engine (e.g., Google) that you are referred to from trustworthy sources.

Let’s have a look at ways to gain those backlinks. In contrast to Technical SEO, (whitehat) backlink building requires continuous long-term work.

Off-Page SEO is one of the three pillars of SEO (Source: Eva Keiffenheim).

Backlink strategy

There are several paths that you can include in your backlink strategy:

  • Google alert for your company name and always claim to mention your enterprise’s name + a link to your site
  • Google your keyword inurl:blog intext”learn more” to figure out blogs you can address
  • look for old content in your niche, make it better and send it to all sites that currently have old backlinks
  • For a high domain authority page link, you can contact your last education institute and suggest writing a blog post for them. For example, I composed a blog entry for Vienna Business University on “Do you need to study if you want to found your company?”

Public Relations

Press coverage can help to gain more traffic from external sources. I followed these steps to gain traction from newspapers:

  • Build a Public Relations network by attending journalism meetups and talking to journalists at conferences.
  • Draft a story and send it to contacts you met and general newspapers.
  • Prepare a media kit with the image sizes and company description length required for your newspaper.

Sounds too easy? This step is all about trial and error, story, and timing.

The more you try, the likelier the chances that a newspaper will cover your topic and refer to you. Are there any trade journals in your niche that would benefit from your insights?

Is there any local newspaper in the area you grew up that would want to portrait you? These are good questions to start with.


Conclusion

For successful SEO, the three fields of Technical SEO, On-Page SEO, and Off-Page SEO are equally important.

The three pillars of Search Engine Optimization (Source: Eva Keiffenheim).

Your time is limited. Decide how much time you dedicate to each SEO field and you want to outsource specific parts like SEO Copywriting or Technical SEO.

SEO is a never-ending process. If you’ll ever say “I have done it all, and I’m finished with SEO,” — you did not understand SEO at all.

Even a few hours of serious SEO work can move the crawl spiders to index your page.


Do you want to stay in touch? Join my E-Mail List.

Filed Under: ✍🏽 Online Creators Tagged With: Entrepreneurship, websites

6 Simple Ways To Find Joy in Remote Teaching

April 26, 2020 by Eva Keiffenheim


#5 Empower your students by appointing technical assistants

Photo by Anthony Tran on Unsplash

Intro

All over the globe, educators work remotely. Through remote teaching, many schoolteachers don’t enjoy their job anymore.

Joyless lessons are a dramatic problem for student’s learning success. If teachers aren’t fond of teaching, students aren’t fond of learning either.

“Teachers who love teaching teach children to love learning.”

— Robert John Meehan

Hence, as an educator, it’s your responsibility to relish online teaching as much as possible.

Here are four actionable steps for making your remote teaching fun.

1. Close your device and allow digital time-off

Be okay with not being accessible 24/7. Set your boundaries. Be clear about when you are not reachable.

Before remote schooling, you set your natural boundaries by leaving the school building.

Working from home, you are responsible for creating those boundaries. If you do not create barriers, your students can neither see nor accept them.

Even if you’re not physically in the same building with your students, teaching is still emotional work.

For example, if you correct assignments on google classroom, you put yourself in the eyes of each of your students. That’s tiring.

Allow yourself to take digital breaks during the day. Award your eyes with unfocused glances into the distance. Slow down your speed of thought.

Put on your favorite music and dance for some minutes. Take the time to prepare your meal.

Here’s a list of things you can do in your home while taking a break:

  • Meditate for a few minutes. If you don’t know how to start, consider trying Calm or Headspace.
  • Breathe deeply or become versed in the breath of fire.
  • Take a nap — take a look at this TED Talk by Matthew Walker in case you think resting is a waste of time.

Only if you feel rested and in balance, you can revel in teaching.

Remember to take digital time-off and close your devices, even for some minutes during the morning.

2. Schedule digital breaks with your students

Do you remember your student, that regularly asked whether you like the new __________ (haircut /outfit /ruler)?

Don’t you miss the casual, comical conversations in the hallway? Many of your students do miss the break time with you.

You were and still are, a critical person of reference for your kids.

Stay this person of reference for students. Give them time to talk to you outside of task assignments.

A “google meets” every other day can do the job. Label this 10–15 minutes meeting as collective recess.

Your students determine what to talk about. In my class, I implemented the “we do not talk about assignments during the break” rule.

You’ll be surprised how much you learn by seeing your students in their homes.

Soon you’ll realize that these playful moments lighten up your days. Joint breaks make your teaching more joyous.

3. Make one cheerful call for every negative call you make

Sounds like extra work? From a time-wise perspective, I’d agree. But you will soon appreciate the energy generated by those appreciation calls.

Your student’s parents do struggle theses days: short-time working, cut paychecks, cramped living conditions, or sick relatives. The list of burdens is endless.

An unexpected encouraging call from your kid’s teacher will bring a smile on their faces. And on yours, too.

You will realize that positive feedback calls bring joy into your days. You will soon realize your motivation hits peaks after such a dialog.

Use this motivation to enjoy your teaching. You deserve to have fun during remote schooling!

4. Stay in touch with colleagues you love talking to

During a precorona week of school, conversations with colleagues happened naturally (sometimes even too much).

Now, the natural exchange with your colleagues is gone. Unless your school hosts online conferences with networking time, you don’t chat with your co-workers.

The lack of natural chatter offers an opportunity for you:

Schooling remotely, you decide whom you want to call. Probably your choice does not fall on the negative, gossiping co-teacher.

You can selectively pick the persons you want to chat with. Call the ones you admire. Text the teammate you miss — Check-in with your humourous companion. Laugh together, gossip together, and share your worries.

“All problems exist in the absence of a good conversation.”

— Thomas Leonard

These conversations will wash away any humdrum and make your remote teaching more fun.

5. Empower your kids by appointing technical assistants

Technical support is your newest job requirement. Fixing your student’s technical issues can be time-consuming.

“My smartphone can’t upload my homework in this Google Classroom” is a prompt you might be hearing from time to time.

If you do the technical fixes on top of your daily schedule, you will soon feel exhausted.

Put your students in charge of technical issues and create a win-win solution to this dilemma.

A promotion interview between you and your student could flow like:

“Julia, I realized you always deliver your homework on time and never had any technical issues. I’m impressed. How do you do that?”

“I don’t know. I guess I’m good at using my smartphone.”

“Technical proficiency is a skill giving you multiple job opportunities in the future. Would you support me as a technical assistant? It’s a job of high responsibility as I’d rely on you to fix technical issues of other children.”

Some of my students even managed to record their screens. Julia shared a tutorial for the entire class. She learned autodidactically and strengthened the class community.

By transferring your responsibility for technical matters to your students, you create more space for other activities. Like self-care:

6. Take good care of your self-care

Eat and exercise. Get plenty of sleep. Treat yourself with self-care time. You are a role model for your students.

If you take good care of yourself, you can inspire students to take good care of them as well.

Your students can tell whether you are teaching from a position of exhaustion or satisfaction.

The better you take care of yourself, the better your interaction with your students. The more joyful your teaching — the more joyful your children’s learning.


Do you want to stay in touch? Join my E-Mail List.

Filed Under: ✍🏽 Online Creators Tagged With: teaching

  • « Go to Previous Page
  • Go to page 1
  • Go to page 2

Footer

Categories

  • ✍🏽 Online Creators
  • 🎯 Better Living
  • 📚 Knowledge Management
  • 🧠 Learning Hacks
  • 🧱Transforming Education

Learner’s Letter

Sign Up for the free weekly newsletter to make your mind work for you.

Copyright Eva Keiffenheim © 2023 · Impressum