• Skip to primary navigation
  • Skip to main content
  • Skip to footer
  • Home
  • Articles
    • ✍🏽 Online Creators
    • 🎯 Better Living
    • 📚 Knowledge Management
    • 🧠 Learning Hacks
    • 🧱 Transforming Education
  • Courses

learntrepreneurs

make the most of your mind

  • About Eva
  • Books
  • Contact

Editing

3 Applicable Lessons I Learned From Building a Profitable Online Course

October 25, 2022 by luikangmk

Here’s what you can take away from it.

Source: Canva

Have you ever wondered what it takes to build an online course that will earn you a living?

When I thought about leaving my job as a teacher at the beginning of 2020, earning money independent from time seemed like a distant dream.

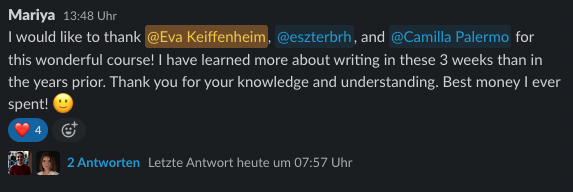
Now it’s reality. I’ve just wrapped up my third cohort-based course cohort. 72 students have joined three cohorts, with a rating of 9.1/10.

If you’re toying with the idea of running a course one day or you’re already running a course and want to improve it, this article is for you. I share my biggest learnings from building and running a cohort-based course with you.


1) The Only Metric Needed for Building a Course Your Students Will Love

Many online courses are money machines for course creators but time-wasters for their students.

Most of the time, people who’ve excelled at their craft aren’t the best teachers. Moreover, the most dominant form of online courses (watching videos) does not align with how our brains learn best.

As a former teacher and learning weird, I didn’t want to settle with how things have always been done. I researched better ways to help students achieve their desired learning goals through online education.

The answer? A format that aligns with the science of learning: cohort-based courses (CBCs).

In CBCs, learners move through a course together, with direct access to instructors, ongoing deliberate practice, and a high accountability system.

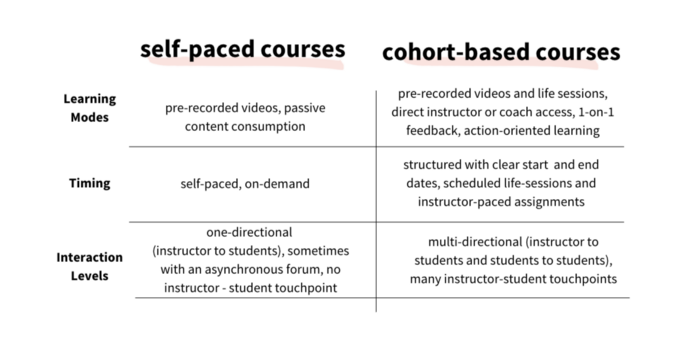
The key reasons why I decided on CBCs are the benefits for students:

  • Real-time feedback on learning progress.
  • Structured access to a subject-specific community.
  • Assignments that are directly linked to their desired learning outcome.
  • Accountability through communities and instructors helps follow through when things get complicated.

What you can take away from this:

You don’t need extensive teaching experience but the willingness to learn and deliver. Your students learning outcome is the only metric that matters. Make student success your number one priority by building a no-BS course your students will love.

How?

You want to be crystal clear on what your students should be able to achieve with the help of your course.

You want to make your course highly outcome-focused (e.g., mastering a skill, landing a job, growing an audience) and focus on the how instead of the why.

Source: Created by Eva Keiffenheim inspired by Wes Kao.

A helpful framework is the following, suggested by Wes: “By the end of the course, you’ll be able to do X without Y (usual blocker or friction).”

Lastly, use backward design to structure your course. Two questions that led my thinking were: “Which activities would students need to practice to achieve the desired learning outcome?” and “Which input is required so they can best complete this activity?”

Consider the learning outcomes and the necessary practice for achieving them before considering how to teach the content.

Design the lessons around action orientation. Provide guided exercises, templates, and step-by-step guides to help your students succeed. This way, you will create a course your students will love.

Screenshot from the Writing Online Accelerator Community Cohort 3

2) Without This My Course Would Have Failed

A friend told me he attempted to copy Ali Abdaal’s structure to make $2,000,000 on Skillshare. My friend soon gave up. He neither had the video experience nor an existing audience that followed him everywhere.

The best tutorial is useless if you compare yourself against someone too different. So here’s a thing I need to reveal.

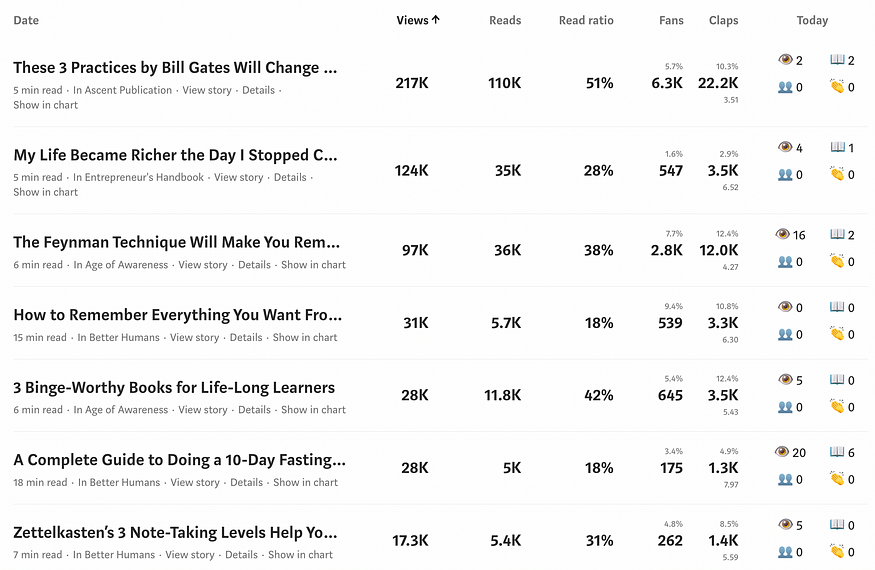
Before creating the course, I had 15,000 followers on Medium, 2,500 on LinkedIn, 10,000 podcast listeners, and 2,900 loyal email subscribers of the weekly Learn Letter.

I am convinced my course would have failed without this existing group of online friends.

Before building my course, I followed Julia Horvath’s instructors to first understand my customers.

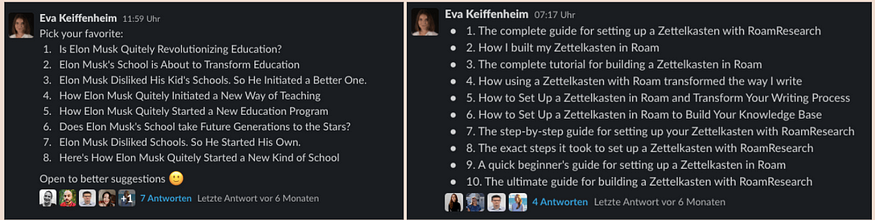
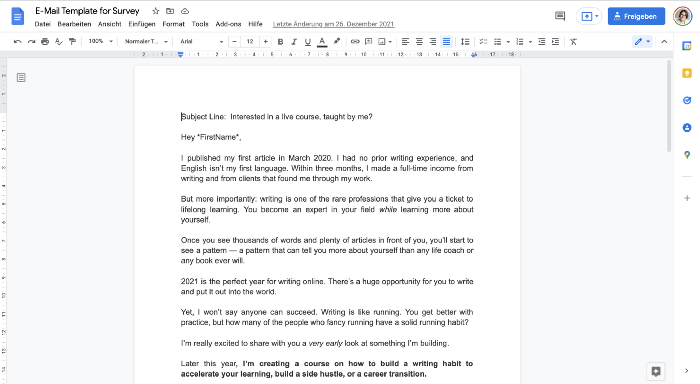
I sent several emails to my subscribers asking things such as: “I’m thinking about building an online course. Which topics would you like to see me cover?” People replied with questions about how to write online.

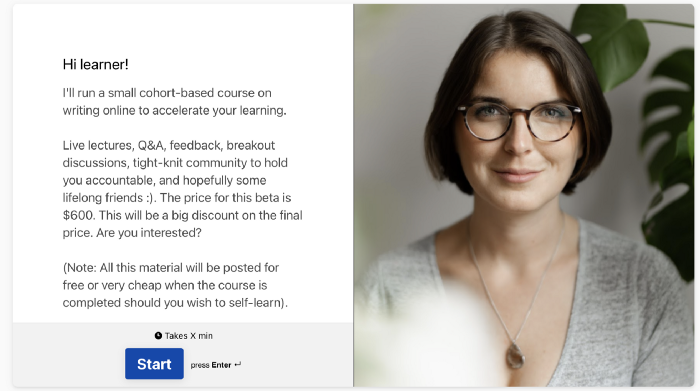
In my next mail, I asked: “What’s the number one biggest challenge when it comes to learning or writing?” Informed by around 25 replies to these two questions, I wrote this email and created this survey. Two hundred people replied to the survey, which helped me with the subsequent step.

The email template I used to ask my audience.
The email led to this survey, where I would capture initial interest.

What you can take away from this:

The biggest struggle most online creators have is selling their courses. This is so much easier if you have an existing newsletter subscriber base.

Build an audience before you build an online course.

If you have close to zero followers on any platform, this might sound frustrating. But what a waste of time would it be to create an online course that nobody ends up buying?

So how do you create an online audience?

Provide value online by being helpful. That’s how James Clear, Anne-Laure Le Cunff, Ali Abdaal, and many other successful online entrepreneurs did it.

This requires a lot of investment upfront, without expecting anything in return.

But once you have an online audience, you can build a course and basically do anything you want. Where do you start?

Choose a means (video, writing, or programming). Then, start creating content and follow your audience’s clues.


3) The Tools and Resources I Use For Running a Cohort-Based Course

After deciding on the CBC format, I researched the best options to host cohort-based courses. I looked into Teachfloor, Teachfloor, Virtually, Graphy, and Classcamp, and ultimately settled for Maven.

Maven was started by the founders of Udemy, altMBA, and Socratic. And you can tell Wes, Gagan, and their team knows what they’re doing. Their creator course accelerator has been the best online learning experience of my life.

What does the platform do for me as a course creator? Maven handles the payments via Stripe, has a landing page builder, sends out calendar invites and emails to students, and offers excellent support if something is not working. I’ve run my first three cohorts on their platform and am very content.

In addition to Maven, there are a couple of further resources I use.

  • Convertkit to run my newsletters and email marketing campaigns ($80/month).
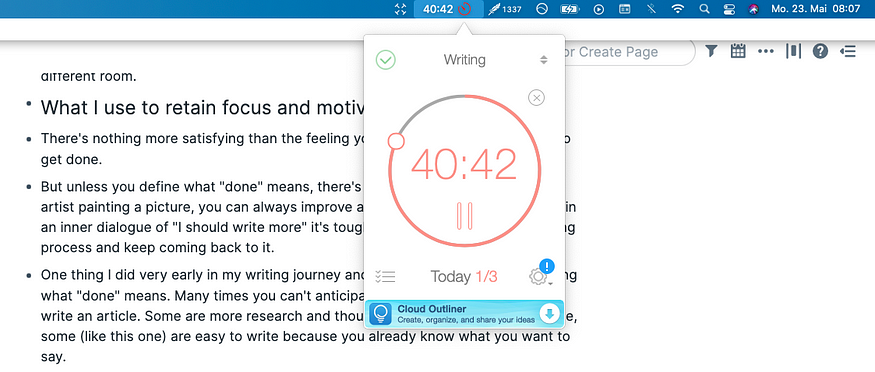
  • Zoom pro for the live sessions and recordings ($50/month).
  • Canva for creating slides ($15/month).
  • Slack for communication (even though I’m considering moving to a different platform, such as Circle or using Maven’s newly inbuilt platform).
  • A second screen, a high-quality webcam, a ring light, and a solid microphone.
  • Clickup to do project management of everything required for pre-launch, launch, running the cohort, and strategy.

And lastly, I have support from brilliant Eszter Brhlik, who supports operations, project management and leads our sales strategy.

What you can take away from this:

Building and running a cohort-based course requires different subskills and some tech tools.

Spend time researching the infrastructure that works best for you. Then, think about the people you need to support you (marketing, sales, creating course material, student support).


What’s Next

Building this course has been one of the most rewarding learning experiences of my life (apart from teaching kids at a school).

I hope you will find similar enjoyment and financial success in building a course your student will love.

May you enjoy your journey as an online creator 🙂


Want to feel inspired and become smarter about how you learn?

Subscribe free to my Learn Letter. Each Wednesday, you’ll get proven tools and resources that elevate your love for learning.

Filed Under: ✍🏽 Online Creators Tagged With: cohort based courses, Editing, Writing

The Ultimate Guide to Help You Write Non-Fiction Articles

October 25, 2022 by luikangmk

The skills needed to grow an audience, create career opportunities, help people, build a side hustle, and become a lifelong learner.

Eva Keiffenheim (Golden Hour Pictures)

I never thought I’d write online and earn money independently from time.

Before March 2020, I hadn’t published anything on the internet. I thought you’d need to study journalism, have a writing degree, a big goal, or at least some relevant experience.

I had none of these.

But I was curious. And I started writing. I took courses, spent my money on writing coaches, read countless books, contacted fellow writers, and kept perfecting my process day by day.

Two years later, more than 2 million people have read my articles on learning and knowledge management, 27k people follow me on Medium, and more than 4k people subscribed to my weekly Learn Letter. More than 60 students took my cohort-based online course and rated it 9.1/10.

But apart from the numbers and building diverse income streams, I found writing to be a vehicle to explore my curiosity, clarify my thinking, and support other people. There’s nothing more rewarding than people telling me my writing has helped them.

As an education expert and ex-high-school teacher, I’m passionate about creating learner-centric material that provides learners with the clear, practical advice they need.

In this sense, I created this long-read article for people who are about to start their writing journey or who are midway through and looking for applicable tools and resources to improve their process. It contains the sub-skills needed to write non-fiction articles.

Whether you’re a curious mind wanting to explore online writing, a professional looking for exciting career opportunities, someone who hopes to share their experiences with the world, or a lifelong learner wishing to clarify their thinking, this article will give you all you need to accelerate your journey.

You’ll find here everything I wish I had when I lacked a process for online writing.

The article is structured in 10 sections containing the exact system I created for writing online. I designed this guide to help you in the best way possible, so each part has actionable steps you can follow.

Once you’ve read this article, you’ll have a well-suited theory and actionable tasks that will help you practice the ideas.

Likely, you won’t read this article in one go, but start with the section you’re most curious about, and come back to this piece when you’re ready to learn more.

Table of Contents
1. How to Stick Through Until You’ve Gone Viral
2. The Key to Audience Growth Many New Writers Miss out On
3. ​​How to Always Live in an Abundance of Writing Ideas
4. Find Your Writing Niche for Growing an Audience
5. How to Write Headlines That Make People Click
6. This Introduction Technique Will Help You Hook People In
7. A Clear Editing Blueprint for Improving Your Writing in 5 Steps
8. How You Can Keep Writing No Matter What
9. The Only 9 Writing Tools I Use For Maximum Efficiency
10. All Free Resources in One Place

If you feel you want to go deeper to accelerate your online writing journey, join my 3-week cohort-based course that runs twice each year. You transform into a consistent writer and lifelong learner. You learn to express your thoughts online effectively, attract an audience, and use your ideas to help and inspire others.

The course is unique because you won’t only learn, but you’ll also apply your knowledge and leave the cohort with three high-quality articles. Because you can only improve your writing skills if you sit down and write.


1. How to Stick Through Until You’ve Gone Viral

Most people fail to attract an online audience because they quit too early.

They expect prompt results. But writing online is no sprint. You see the effects of your work only once you’ve passed the invisible virality threshold. And to pass it, you need to learn and improve while no one reacts or replies to your work.

The issue is that as you put more time and energy into writing, sticking through becomes harder and harder.

When I hit publish for the first time, I felt insecure but great. My friends cheered me and shared one of my first articles across their LinkedIn and Facebook accounts.

As with every new learning adventure, initial enthusiasm vanished fast and made space for reality. I became more aware of my unknown unknowns — the things I wasn’t even aware of in the first place but that I realized later are relevant for succeeding with writing online.

And as if this burden wasn’t enough, no one read my work.

What I call “writing in the void” (aka practising in public) is the hardest part of becoming an online writer. Until you’ve crossed the virality threshold, no external factors attest to your learning.

You don’t get thoughtful comments.

You don’t receive emails of gratitude.

You don’t see any financial rewards.

And that’s where most people give up.

If you want to experience the diverse benefits of writing, don’t be one of them. Instead, treat writing as a marathon.

It took me one single article to reach 100,000 people and gain 500 subscribers. But there were 39 articles before where I didn’t get any reaction at all. If I had quit after article 39 (and about 300 hours of writing and learning), I would have never crossed the threshold.

If you stick to a consistent, deliberate writing practice (more on what it contains in the sections below), you can achieve the same.

Your single most important goal when starting to write online is to not expect anything in return until you’ve published 100 articles (thanks for this wise advice Sinem Günel).

Growth in your writing audience is not linear, but exponential. Source: Writing Online Accelerator Module 1

What you can do now

Prepare yourself for long-term writing, with a realistic plan you can stick to even when you don’t see any traction.

Approach writing online as you would approach preparing for a marathon. Instead of having the goal of running for 42.195 kilometres, you want to set the goal of publishing 100 articles online.

When tracking your progress, don’t focus on any external metrics such as followers, claps, or subscribers. The only thing you should track is the time you’ve spent writing and the number of articles you’ve published.

To stick through until you’ve published 100 articles, plan backwards. Grab a sheet of paper or open your note-taking app and answer these questions:

  • How many hours a week can you spend writing? (Hint: the ideal number is the one you can stick with)
  • When are you actually going to sit down and write? How can you block out time for writing? What do you need to stop doing to have time for writing?
  • How many hours do you need per article? (Hint: with practice, your writing time will decrease; my first articles took me about 12 hours per article, but I’m now at roughly 3 hours per article).
  • When will you have published your first 100 articles?

2. The Key to Audience Growth Many New Writers Miss out On

Most writers don’t set up their email lists from day one because they think it’s unnecessary.

They believe nothing can be more important than writing and learning how to write better. An email list feels like a painful extra step.

Many people also feel as if they lack the tech knowledge to do it and don’t want to waste hours figuring out the setups. There are too many providers, and precious writing time can fly away trying to figure out how to set up an email list.

Yet, ignoring the importance of starting an email list from day one is a mistake you can never engineer backwards.

When your first article goes viral without a call to action, you’ve lost your first hundred-something subscribers who’d be genuinely interested in your work. You’ll grow slower, and you’ll be at the mercy of algorithms.

And even though I felt awkward asking my seven readers to subscribe to my non-existing newsletter, it was the best thing I could’ve done for my writing career.

Because the thing is, platforms change. Emails don’t.

If you one day want to sell any digital product, you need an email list. You won’t depend on an algorithm: your readers will see you even if your writing doesn’t appear in their feed.

What you can do now

The good news is that setting up your email list isn’t rocket science. You can do it in less than 30 minutes. Three steps are required: registering on Convertkit, choosing a landing page, and creating a Call-to-Action through which you ask your readers to subscribe to your list.

First, register on Convertkit.

Second, sign up free in the right corner of the website and create a free account. I recommend Convertkit over other email providers because the platform will cost you nothing for your first 1,000 subscribers, and it is optimized for online creators.

Third, pick a landing page. When you set up your landing page, keep in mind: the longer you try to create a well-designed landing page, the less time you’ve left for writing articles.

Especially in the beginning, the appearance of your landing page doesn’t matter much. It’s better done than perfect. Add a picture of yourself to make your page more personal, or a royalty-free image from Pexels, for example.

Then, add a Call-to-Action (CTA) underneath each of your articles

In the beginning, start with a generic CTA: It’s better to start with a good enough CTA than not at all, and you can easily adjust your CTA once you’ve figured out your niche and know what you want to do with your list.

Your first Call-to-Actions can sound like this:

  • “Want to improve X? My newsletter will help you create the Y you need to move towards a Z future.”
  • “Get access to exclusive X content. Subscribe to my free newsletter here.”
  • “Want to stay in touch? Subscribe to my email list.”

If you don’t want to do this now, grab my free 5-day email course on setting up your email list in 20 minutes. Each day you’ll get straight-to-the-point help with exact steps and to-dos on why and how to set up your writing for audience growth.


3. ​​How to Always Start From an Abundance of Ideas

Ideas are the most essential building blocks of articles because the writing can’t even start without having them.

When I started, I feared I’d soon run out of ideas.

I feared sitting in front of a blank page. I worried about writing “too early” about my best ideas and running out of topics afterwards. I doubted I had anything worthy to say.

The thing is, writing isn’t about sitting down in front of a blank page and waiting for the best idea to come.

Most people think they don’t have ideas when in reality, the problem is they don’t train their minds to pay attention to their ideas and then don’t collect their ideas.

If you judge your ideas and don’t capture them with an open mind, they’ll be gone. And without having ideas, it’s impossible to write.

The good news is you don’t have to wait to have more ideas.

Creativity is practice. The more you create, the more creative you’ll become. If you train your brain to develop ideas, they will, at one point, just flow into your life.

What you can do now

In the beginning, you need conscious practice. Ask yourself a couple of times a day what do I want to write about?

Put a sticker in your bathroom, on your fridge, or your phone screensaver. Even if your mind doesn’t have answers in the first place, trust the process.

If you ask yourself these questions five days in a row, you’ll have plenty of ideas to pick from.

There are a couple of things you can do to facilitate this process.

Pay attention to your surroundings, read books, pay attention to your mind, and talk with people.

Most importantly, when a new idea comes into your mind, don’t judge that early idea. You only know if they’re good once you’ve written about them.

If you label your early ideas as “bad ideas,” you tell your brain that it’s wrong to develop new ideas. That way, you hinder your ideation process and make it harder for your brain to come up with a new idea next time. Thus, to generate more ideas, treat your new ideas very gently.

Once the idea is there, note it down, no matter what. You make sure to never again run out of ideas by taking the process into your own hands. That is, having a safe space where you capture and store your ideas.

I’ve experimented with a lot of idea-capturing tools. I used Trello, Notion, an excel sheet, and Milanote. Lately, I’ve discovered and settled for xTiles because the platform combines all features I was looking for.

Here’s what it looks like:

My current idea board xTiles (Screenshot by author).

The lesson is — it’s not about the tool but about your process.

Commit to capturing your first five article ideas in the tool. Some helpful prompts to come up with writing ideas: I used to be Y, this is how I turned into Z (e.g., I Used To Have Social Anxiety. These 4 Mental Shifts Made Me More Confident), What you can learn from Z will change Y (e.g., 3 Resources about Learning that Will Change How You Look at Education), or questions and topics you’re curious about and want to learn more.

The next section will guide you on how to pick the ideas worth writing about.


4. Find Your Writing Niche for Growing an Audience

“How do I find my niche?” is a question I get asked a lot. Many writers think they should have a focus area when they start writing.

And while this gives you some form of security, it’s the wrong thing to do. When you niche down too early, you miss out on growth opportunities. Because you have no data on what resonates with your audience. And you can’t know which topics you love writing about.

Source: Screenshot from my course Writing Online Accelerator, Module 1

When I started, I wrote about anything from relationships, SEO, and intuitive eating. My assumption was I’ll end up writing about love and psychology.

Soon I realized while I love talking about these topics in my podcast and with friends, I don’t like writing about them. Only 20 stories in, when looking at the data, I realized the stories on learning and books perform best AND that they were the ones I loved writing.

Don’t try to niche down when writing your first 30 or 40 articles. Embrace the opportunity only beginning writers have — writing about anything you’re curious about.

Niching down will happen with time if you write about topics that make you curious and monitor the stories that engage your audience.

What you can do now

Open your idea tool (check the previous section if you don’t know what that is) and add five broad themes that you would like to explore (e.g., computer science, biographies, history entrepreneurship).

Then, look at these themes and a couple of specific article ideas by asking yourself for each of them:

  • What could be a specific topic I’m curious to explore?
  • What’s a topic I have strong emotions or opinions about?
  • What’s a question inside this theme that I have found an answer to?

When writing your next articles, commit to picking ideas from different topics. Use the Meta log (more in section 10) to track whether you actually enjoy writing about it.

Once you have published at least 20 articles, look at the data. Sort your articles by clicking on your preferred metrics, for example, views. You will see how many people clicked on the article.

Source: Screenshot from my course Writing Online Accelerator, Module 6

After you’ve published more than 20 articles and filtered by the view, check whether there is an intersection between your top-performing pieces and the ones you love writing about. No? Continue writing and check again after 20 more articles. Yes? You’ve found your niche!


5. How to Write Headlines That Make People Click

If your headline isn’t good enough, no one will read your articles. Your content can be perfect. But you drive the audience into your writing through the title.

The title is the very first thing a reader sees, and online platforms have an infinite amount of content. Thus, if your headline doesn’t stand out from the crowd, online readers will scroll further and pick a title that awakens their curiosity.

As a result, even if you invested hours of work into perfecting your article, you won’t have many readers with a meh headline. No matter how great your content is, you won’t be able to drive an audience into your writing. No one will read your work if your headline isn’t interesting enough.

Your title can literally make or break the success of an article.

Almost no one read my articles in early 2020. It’s no wonder as my headlines were as boring as “The digital gap is increasing — we need to act now!” and “Out of your head and into your body in less than 5 minutes”.

Researching and implementing some headline components in my titles helped me reach more than 2 million readers in less than two years.

If you ever want to be a successful writer, you need to start working on your titles. Because if no one clicks on your heading, you’ll always have zero readers.

The good news is headline writing is a skill you can master.

Once you understand the components of successful headlines, you can create your own engaging titles.

But consistently writing headlines that make people click is more complex than you might think. It requires continuous practice and re-learning.

Six core components will help you craft titles that make people click. If you internalize them and deliberately practice headline writing (more on that in the section below), you’ll be able to create your own highly engaging headlines.

The first component is the reader’s benefit. Great headlines focus on the reader and deliver value either directly or indirectly. It is clear that the writer didn’t write the content to herself, it’s not a journal but something useful for the people. For example, If You Want to Be Rich, Spend Your Time Buying Assets, or The Feynman Technique Can Help You Remember Everything You Read.

The second component is breadth. Choosing a topic that’s appealing to a large audience is usually present in popular headings. While I love writing about education and learning, I also accept that an analysis of Estonia’s education system likely won’t go viral. Whereas the title 9 Micro-Habits That Will Completely Change Your Life in a Year speaks to a very broad audience.

Thirdly, people like sharing things on the internet that either make them look smart or helpful. An article with the title The 7 Emails You Should Send Every Week to Get Ahead in Your Career has a great chance to be widely shared on LinkedIn.

The fourth component is novelty. Don’t try to recycle the old but well-performing headlines because people will realize it. What worked well in the past won’t go viral today. Unless you bring some novelty to the discussion and show your spiky point of view — a view that is slightly controversial and with which some people would disagree. An example of this is Self-improvement has made me worse,

Next, when I did my headline research, I realized headlines that contain proof are likely to perform well. The proof can come from famous people, such as Elon Musk’s 2 Rules For Learning Anything Faster. Or you can also add self-proof as I did with the article This is How I Made My First $30,000 From Writing Online.

Lastly, countless viral articles provoke emotions. They’re either controversial or use powerful words, such as the ones in the gif below. An example of an emotion-provoking headline is Today I Learned Something About My Boyfriend That No Girl Should Ever Have to Discover.

Emotional word bank. Source: Coschedule

What you can do now

Now, knowing the components of well-performing headlines isn’t enough. It’s like reading a book and believing you’re well-prepared for the exam.

To craft headlines that make people click, you need to practice. Headline writing is a skill you can master, but you’ll need to spend time crafting multiple headline variations.

So these are the exact steps you need to craft a high-performing headline.

First, collect the headlines you click on in your idea board (more on that in section 3). They will serve as inspiration to you.

Second, before starting to write an article, ask yourself, “what’s in it for the reader” and “which 2–3 headline components would fit the topic of my article?”

For each article, you write, try to craft ten headline variations as I did in the picture below. Don’t worry about perfecting the title yet; this time, just write what comes into your mind.

Source: Screenshot from the Writing Online Accelerator Module 2

Once you’re ready with the headline variations, pick the one you’d click, or ask your friends or writer buddies to choose for you.

To further boost your chosen headline, I recommend the free version of CoSchedule. Insert your title, and swap words until you reach a score that’s above 70. Repeat this practice for each article you write.

Source: Screenshot from the Writing Online Accelerator Module 2

I know this process can be tiring. But it’s worth it. Keep Ayodeji Awosika’s wise words in mind:

“I’ve written more than 15,000 headlines since I’ve started writing. Only one per cent of them are really good. Those one per cent of headlines I’ve written created 100 percent of my viral successes. Every single morning, I write down 10 ideas for headlines. […] I promise, if you don’t learn how to write good headlines, you’ll never have a career as a blogger. Never. So do I.”


6. This Introduction Technique Will Make People Interested in Your Work

Countless writers start their articles as if they were writing their life stories. Lengthy anecdotes, unrelated information, and a lot of beautifully written fluff.

Online readers are barely interested in such introductions. They clicked the headline because they wished to have something out of the writing, such as advice, entertainment, or a piece of specific information.

Sloppy introductions can destroy the time investment you put into crafting your articles. You convince your readers to click on your story with your headline. But you hook them into the story with your introduction.

An efficient tool for writing engaging introductions is the PAS formula. The acronym stands for Problem, Agitation, and Solution. That’s how you structure your introduction.

In the problem part, you need to pick a painful issue and describe it in one sentence.

In the agitation, you make the problem more specific and more emotional, almost unbearable.

Lastly, in the solution, you offer a way out. You propose a solution.

Here’s an example from one of my articles:

Source: Screenshot from the Writing Online Accelerator Module 4

What you can do now

To write a powerful PAS arrange your introduction into three parts.

In part one, ask yourself: what is the problem I’m trying to solve? Why is it painful for the reader? What is the pain about? You can start with prompts, such as:

  • Have you ever wondered…?
  • Do you ever…?
  • Do you also?
  • Most people face….problem.

In the second part, agitate on the problem. Ask yourself how you can be more specific. Is there a real-life situation that happened to you or to a friend that would fit the context and could help you make the problem more vivid? You can continue with sentences, such as:

  • If you also feel like….it’s likely because…
  • I/ My friend also…insert problem that happened frequently.

Lastly, offer a way out for your readers. Ask yourself: How can I describe the solution briefly? Tell why the article would immensely help the reader. You can close your introduction, for example, with:

  • By….., you’ll….
  • Discovering….helped me…. It’ll also help you with…
  • These are….that you can easily apply in….to….
Source: Screenshot from the Writing Online Accelerator Module 4

7. How You Can Make Your Articles 10x Better With This Clear Editing Blueprint

Have you ever invested too much time into editing your articles?

I know the feeling of desiring the perfect article. I feared of being judged by the online world.

The problem? With this mindset, an article will never be good enough.

Writing is creative work. You’re never done if you aim for perfection, as you will always find something to improve.

At the beginning of my writing journey, I spent 17 hours editing a single article. And the outcome was average. The article only had a few hundred views.

The problem with this mindset is that the time you spend editing is the time you don’t spend writing. I could have spent those 17 hours writing instead of perfecting one single article.

And in the online world, quantity matters. If you publish less, you have fewer chances of going viral. You can think of each article as a lottery ticket. Maybe it’ll take off and bring you exponential growth.

But if you spend hours perfecting your work, you won’t be able to publish more.

To avoid this, define an endpoint for your editing process. I now have a clear structure I follow to know when my article is good enough. I hit publish despite any insecurity, accepting my fear of being judged. Good is better than perfect, and I know the opportunity costs of not starting to write a new article.

What you can do now

Here are the steps I follow when editing my articles. Feel free to steal them, if you struggle to edit the paper in a way that makes you feel content with your work.

First, put the heading in the title case format with this free app by inserting your heading into the “Add your title in here” white space. When you scroll down, you can copy the result. (1 min)

Second, read the text out loud to recognize inconsistencies and check the flow. When you read out loud, you put yourself in the reader’s role, and that way, you can spot flaws in your writing. Delete everything that doesn’t add value to your article. (30 min)

Third, improve the section headings. Think of your section headings as they’d be mini titles of your article: they need to encourage your readers to keep reading. Thus, they should also follow the principles of great headlines — more on that in section four. (5 min)

Fourth, polish your word choice and cut the fluff. Great online writing is simple. You don’t need to use sophisticated words and lengthy sentences to convey deep messages. (5 min)

Fifth, check the grammar with the free version of Grammarly. You can write with flawless grammar even if you’re not a native speaker. Sign up, add the app to your browser as an extension, and enable the grammar check for the platform where you write. (5 min)

Sixth, format the text according to the requirements of the platform. Like most platforms, Medium also has formatting requirements. The most important ones in a nutshell: Put your heading and subheading in the right format. Add section headings. Add section breaks to divide your post into sub-paragraphs. If you quote someone, use the quotation format. Get my Free Medium Formatting Guideline for visual examples. (5 min)


8. How to keep writing no matter what

After a few months without much traction, writing can feel like an aimless, soul-draining activity you can’t get out of your head. A tempting black box that might one day bring you the desired outcome.

You’re barely getting any better, keep repeating the same mistakes, and can’t get enough motivation to write nearly every day. You don’t track how much time you invest in writing, and you’re also unaware of what you actually like writing about.

If you don’t find a solution and continue writing without reflecting, you will either give up writing at some point. Or your writing will always remain mediocre, and you will never reach a broad audience.

You can end up wasting the precious hours you’ve invested and say goodbye to your dreams of becoming a writer.

I’ve almost been there. I didn’t know how to track my writing progress in a meaningful way.

Building on my background in education, I came up with a tool. The goal? Keep getting better at writing while getting my motivation high. This tool can also help you build a consistent, deliberate writing practice.

I call it the writing meta log as it fosters your metacognition skill. In essence, this skill helps you understand the way you’re thinking, and it makes you aware of both your strengths and weaknesses. It helps you create the process that suits your unique needs and supports you in the long run.

This is my meta log from April 2020:

Source: Screenshot from my course Writing Online Accelerator, Module 6

What you can do now

The framework of meta writing log looks like this. You can either create your own in a spreadsheet or get the template free here.

Source: Screenshot from my course Writing Online Accelerator, Module 6

To make the best out of it, fill a line every time you finish your practice. Rely on these three principles to make the best out of the meta writing log:

  1. Write it for yourself. No one will read it.
  2. Use it every time you write: the longer you keep collecting data, the more useful it will be.
  3. Highlight your critical lessons, for example, by bolding them.

As an extra motivation, you can reward yourself for days you’ve filled this out straight. You can invite yourself for a coffee or treat yourself with something you enjoy. It can be a hot bath or a long walk in nature. It totally depends on your preferences.

If you use the metalog consistently, you’ll discover a pattern and see which topics flow well and which are the ones you don’t prefer that much. You’ll reflect after every writing session and through it, you’ll develop a writing process that serves you the best.


9. The Only 9 Tools I Use to Write Great Articles in Three Hours

Most people think they need expensive equipment and fancy tools to become professional writers. Yet, that’s not the case.

I only rely on nine tools, and most of them are for free. Here’s the list:

  1. The free version of BlockSite Extension disables websites at the time you want. I blocked LinkedIn, Gmail, Slack, and Facebook during my writing time (7AM–10AM).
  2. BeFocused is one of my favourite productivity tools. I use it as a game against myself. I work in 50-minute intervals. Before I start the timer, I set an intention (e.g. editing an article and hitting publish in 50-minutes). The next 50-minutes require full focus to beat the clock.
  3. I bought noise-cancelling headphones that help me quickly get into and remain in the flow state. This way, I’m not distracted by any sound and I even enjoy writing on a train.
  4. I collect and manage my ideas with xTiles. More detailed description of this is in section three.
  5. English is my second language, so I use Grammarly for (mostly) mistake-free writing. I got the paid version, but the free version also does a good job.
  6. Readwise and Roam help me optimize my writing process. Too complex to explain in a bullet, but I share it in my writing course.
  7. For correct title case creation, I use the free Title Case Converter.
  8. Power Thesaurus helps me expand my vocabulary and increase my word choice. It’s a fast, convenient and free online word bank. I use the free chrome extension to have in-text suggestions.
  9. CoSchedule turns good headlines into great ones. Check out section five for more details.

What you can do now

Check out the tools that you consider the most helpful for your current stage and start working with them.

But remember, the most important “tool” for your journey is your undisturbed writing time.


In Essence

Writing has changed my life.

It has created career opportunities I never dreamed of. I’ll be, for example, a speaker at the European Union Education Summit in Brussels this winter.

It’s my lifelong learning tool. I discover something new about myself or the world every time I write. It has advanced my industry knowledge, altered my physical and mental health levels, and improved my relationships.

Writing is one of the most rewarding habits you can build. And I know from experience writing online isn’t only for writers.

  • It’s for anyone who wants to grow as an individual. You can clarify your thinking and become a lifelong learner through writing.
  • It’s for anyone who wants to reach more people. Sharing your thoughts online enables you to reach an insane amount of people.
  • It’s for anyone who wants to accelerate their professional life. With every new article you write, you show the online world the expertise you have in a given field. People who’re interested in your expertise will pay attention.
  • It’s for anyone who wants to meet and exchange with like-minded people. In the internet era, you don’t have to stick to your local communities to build connections.

If you’re still here, you know all the components you need to kickstart your writing journey.

  • Your mindset to fuel sustainable growth
  • Your email list to build an audience
  • Your ideation process to never run out of writing ideas
  • Your headlines to drive people to your work
  • Your introductions to hook your readers in
  • Your editing process to avoid perfectionism
  • Your tools to make technology work in your favor
  • Your ability to reflect to see the bigger picture and improve deliberately

If you’re just starting, this article can be a lot to digest. But no worries. You don’t need to feel overwhelmed. You can revisit this article at any time and progress at your own pace.

Work on one section for at least a week. Then move on to the next one. If you’re at the very beginning of your journey, I suggest you start with creating your idea board and then learn to sit down and write regularly. Then, focus on headline practice, and set up an email list.

If you want to level up and commit, join the waitlist for the next WOA cohort (scholarships available). In the course, we will cover all of this in more depth. As an education expert, I’ll guide you through practical tasks, and you’ll leave the cohort with three high-quality articles reviewed by experienced editors and by me.

The course is for you if you’d like to learn from someone who doesn’t only have expertise in the field of the skill but also teaching. Because no matter how experienced someone is at cooking, writing, painting, or photography, their course will be useless if they don’t know how to teach.


Join the waitlist for the next Writing Online Accelerator cohort

Bonus: All my free resources in one place

I’m here to help you. So below, you find a list of all the free resources I’ve created for writing online.

If there’s something else that you’d love to be on this list, reply to one of my emails with what you want.

  • 5-day writing course on how to attract an audience online
  • Free Medium Formatting Guideline
  • Inspiration board to collect the inspirational content you consume
  • Writing Meta-Log template to reflect and track your writing process

If you’d like to read more on the topics of this article, check out the articles below:

  1. How You Can Write with the Right Mindset to Fuel Sustainable Growth
  2. The Simple Hack for Audience Growth Many New Writers Miss out On
  3. I Used to Run out of Writing Ideas. This Repeatable 3-Step Process Helped.
  4. How to Easily Find Your Writing Niche for Growing an Audience
  5. 6 Principles That Helped Me Write Effective Headlines
  6. How to Master the Most Important Yet Underrated Writing Skill
  7. This Introduction Technique Can Make People Read What You Write
  8. The 51-Minute Editing Framework to Feel Confident When Publishing Your Articles
  9. The Only 9 Tools I Use to Write Great Articles in Three Hours
  10. How the Meta Log Can Turn You Into a Better Writer

Other articles I’ve written on writing:

  1. This is How I Made My First $30,000 From Writing Online
  2. How to Create like Elizabeth Gilbert
  3. How a Leftover Graveyard Will Make You Edit Without Mercy
  4. Stephen King’s 8 Tips Can Improve Your Writing and Editing
  5. The Two Learning Curves First Time Writers Need to Master

A very special thanks to Eszter Brhlik for co-creating this article with me.

Filed Under: ✍🏽 Online Creators Tagged With: Editing, Writing

The Only 9 Tools I Use to Write Great Articles in Three Hours

August 7, 2022 by luikangmk

They will help you improve your writing process.

Eva Keiffenheim (Credit: Florentina Olareanu/Golden Hour Pictures).

When I started writing online, I thought you need the best equipment and tools to become a professional writer.

I got distracted by all the options for upgrading my work setup. I believed you would need to invest plenty of money to write great articles.

In the past two years, I experimented with all the popular options out there and settled for these ten. Most of them are free, and they help me craft an article in less than three hours. They can do the same for you.


1) This browser extension helps you not get distracted

Writing with full focus is a superpower many people lack. With distractions one browser window away, thinking and writing become a struggle.

In the beginning, whenever I didn’t know how to continue a story, I’d impulsively open a new tab with LinkedIn to distract myself. This wasn’t a conscious choice. Distraction just seemed to happen to me.

The following tool has been very helpful in overcoming the distraction habit. I searched for it after reading Cal Newport’s ‘Deep Work,’ and I continue to use it every day.

BlockSite Extension disables websites at the time you want. There must be many similar alternatives, but I use the free version and I love it.

How this tool helps you write great articles fast:

What are the websites or apps that distract you from writing? Add all sites that prevent you from doing the work.

I block the below sites 07:00 am — 10:30 am every day so I can focus on undistracted creation time.

Blocked sites from 07:00 am — 10:30 am (Credit: Screenshot by Eva Keiffenheim of BlockSite)

Depending on your schedule and work, the sites and timing will look different for you. Once you’ve found the right settings for you, you don’t have to look at it again.


2) An easy way to retain focus and motivation

Do you know that satisfying feeling of completing a task in the allocated time?

With writing, this is tricky. Because unless you define what “completion” means, writing has no end. Similar to an artist painting a picture, you can always improve.

You often can’t anticipate how long it will take you to write an article. Some are more research and thought-heavy and require more time; some (like this one) are easy to write because you already know what you want to say.

A cornerstone habit in my writing process is defining “done” and sticking to it. If you always finish your writing time with the feeling of “I should write more,” it’s tough to keep coming back to it and stay consistent.

If you write too much, it can ruin your motivation. I finish writing before I’m exhausted. That way I’m quitting at a point of deep satisfaction (by flow state and deep work) and I’m excited to get back to my desk and write the next morning.

In my writing world, “done” is determined by undistracted writing time. While I can’t fully influence how many words I type in a given time, I can determine how much time I want to spend writing.

BeFocused is the tool that helps me keep track of it. In essence, it’s a free productivity timer. You have quick and easy access in the toolbar, can track how many sessions you completed, and time your pauses.

BeFocused productivity timer in my toolbar (Credit: Screenshot by Eva Keiffenheim of BeFocused)

How this tool helps you write great articles fast:

How do you know you’ve achieved your writing goals for the day? Set a realistic writing time goal. Then, stick to it.

I write three times for fifty minutes. When I sit at my desk (mostly at 7 am) I open my Spotify writing playlist (more on that later) and click on “start” in BeFocused. This combination signals to my brain it’s time to get into writing mode.

After each 50-minute interval, I take a five-minute break. I make myself a tea or coffee, walk around in my apartment, do some stretches, look outside the window, or clean some stuff.

If you can, don’t check your phone during breaks, but put it into flight mode in a different room.


3) What I do to get into a writing flow

Flow states are your sweet spot of peak performance. It’s where your writing magic happens.

And yet, I used to find it difficult to get into “the zone.” And once I was in there, it was a fragile state. I was annoyed by every distraction. I snapped at my partner when he asked me a question, I was angry at the postman when the doorbell rang so he delivered a parcel, I was even annoyed by birds.

It wasn’t until I bought noise-canceling headphones that my flow states became the new normal.

I got these ones from Bose. I know how privileged I am to be able to spend money on optimizing noise. Likely there are cheaper noise-canceling alternatives that do the same.

How this tool helps you write great articles fast:

A steady noise input can help you ease into a flow state. I put them on whenever I start to write. I then choose one song from my Spotify writing playlist and put it on repeat.

Since I use these headphones I get into flow states wherever I am, even in the backseat of a car during a 3-hour drive or in a public park. They help me be in fully focused writing mode whenever I want to.


4) Collect and manage ideas with xTiles

When I started writing, I felt I had nothing worthy to say. I thought I’d soon run out of article ideas. Two years and 300 articles later, I know I was wrong about both.

If you don’t kill your baby ideas but capture them, you never run out of writing ideas. To capture and manage my ideas I use xTiles. It’s a merge of Notion and Miro that helps you keep a visual overview.

xTiles for managing my ideas (Credit: Screenshot by Eva Keiffenheim of xTiles)

How this tool helps you write great articles fast:

Collect every idea you have. This will help you save time in your writing process. You don’t start with a blank page but can choose out of an abundance of ideas.

I have a bookmark in my browser reading bar. Whenever an idea crosses my mind while writing, I type it down and add context or links. If I’m on the go, I do the same from my phone.

Your best ideas arise when you don’t expect them. The most important part is to have a capturing tool. With the right system, you’ll always have enough ideas.


5) The lifesaver for non-native English speakers to publish with confidence

“But what if my English isn’t good enough?” is something I often hear from students in my writing course.

I shared the fear. Growing up in rural Germany I never felt comfortable talking in English. But the thing is: many of your readers aren’t English natives as well. For them, it will be easier to understand your articles.

But if you’re still feeling insecure (which I definitely did), the following tool can have your back.

Grammarly suggests corrections for your grammar and word mistakes, helping you communicate effectively and as you intend.

Grammarly’s suggestions for this article (Credit: Screenshot by Eva Keiffenheim of Grammarly)

How this tool helps you write great articles fast:

Use Grammarly once your article is ready to be edited. It will improve your articles and ease you from language worries.

I write my articles in Roam and paste them into a language formatting tool and into Medium drafts. I format my article in Medium (headline, subheadline, section headings, correct image attribution, spacing, and a call to action at the end) and then run a Grammarly check. I include all “correctness” suggestions and see whether there are useful hints for clarity, delivery, and engagement.


6) The power engine behind my idea-to-paper process

There are five steps to my creative workflow: seek, consume, capture, connect, and write. Readwise and Roam help me optimize the capturing and connecting process.

Readwise is an online service that imports all your article and book highlights into other software. You can do a ton of things with Readwise, but I mainly use it for importing my kindle highlights into my Roam database. Roam is an online workspace for organizing and evaluating your knowledge.

I used to have an entire workflow around Zettelkasten and Roam system and I still do.

How these tools help you write great articles fast:

I see the Readwise and Roam combination as my curated google. When I write an article about creativity I type # howtobecreative or # creativity I find any related book highlight, article, or personal thought. I tried Obsidian for a couple of weeks but switched back to Roam.

Once you have a clear idea-to-paper process you can write and create faster. You no longer waste time searching for sources. Instead of using my brain to browse through books and digital bookmark notes, you have everything in one place.


7) Increasing word variety with this free extension

Ever found yourself repeating the same word thrice? Especially as a non-native speaker it can be tough to come up with synonyms.

Power Thesaurus helps you expand your vocabulary and increase your word choice. It’s a fast, convenient and free online word bank.

Power Thesaurus helps you find synonyms (Credit: Screenshot by Eva Keiffenheim of Power Thesaurus)

How this tool helps you write great articles fast:

Whenever I’m editing an article and feel as if I’ve repeated the same word too often, I highlight the word, click on the powerthesaurus icon and check for synonyms. If there’s a word I like, I use it.


8) Write powerful headlines with the free headline analyzer

Composing great headlines is the most underrated writing skill. You can have the most amazing story. But if your headline sucks, nobody will read your work.

The following tool won’t magically make your headlines click-worthy. And yet, CoSchedule can turn good headlines into great ones. The tool checks your word balance, clarity, reading grade level, and many other factors to calculate a headline score.

Coming up with a headline for this article (Credit: Screenshot by Eva Keiffenheim of HeadlineStudio)

How this tool helps you write great articles fast:

After you’ve written a couple of headline variations, paste your favourite one inside the tool and start to experiment. You can use powerthesaurus (the tool from above) to come up with better words.

Once I have a +70 score and feel confident, I paste the headline into my Roam and start writing. I do this before I write an article as the headline will determine the structure.


9) Format your titles in the right way

Title case is the correct style for article headlines. You capitalize every word except articles (a, an, the), prepositions (in, on, for, up, …), and coordinating conjunctions (and, or, but, …).

There are some rule exceptions and luckily, you don’t need to memorize them.

For correct title case creation, I rely on the free Title Case Converter.

Title Case Converter for correct spelling (Credit: Screenshot by Eva Keiffenheim of Title Case Converter)

How this tool helps you write great articles fast:

Editing can become a never-ending process. This tool is one step inside my efficient five-step editing process. All you need to do is copy and paste the title to get the correct spelling.


In Summary

While these tools won’t turn you into a professional writer overnight, they will help you write better articles in a shorter time.

BlockSite, BeFocused, and noise-cancelling headphones help you stay productive and ease into flow. Software such as xTiles, Readwise, and Roam, optimize your idea-to-paper process. And lastly, Grammarly, CoSchedule, Title Case Converter, and Power Thesaurus improve your editing process.

But most importantly, use this article as inspiration, not as a blueprint. Pick the tools that seem helpful and ignore the rest. The quintessence to becoming a better writer is to write.


Ready to accelerate your writing journey and build an online audience?

Subscribe for a free 5-day course on how you can set up the single most important thing writers usually forget to attract a large audience online. With a total time investment of only 20 minutes.

Filed Under: ✍🏽 Online Creators Tagged With: advice, Editing, Ideas, inspiration, Writing

The 51-Minute Editing Framework to Feel Confident When Publishing Your Articles

August 1, 2022 by luikangmk

A clear blueprint to improve your writing.

Photo by Vadim Sherbakov on Unsplash

Have you ever spent hours editing your article, wondering when it’s finally good enough?

Most writers forget the opportunity cost of editing. The more time you spend editing your article, the later you start writing a new one.

I used to try to make my work perfect. I spent 10+ hours editing. In the end, I had an average article with a few hundred views. With that time, I could’ve written at least three new articles.

You can think of every new article you publish as a lottery ticket. The more you have, the more chance you have to go viral or semi-viral with some of them. And this matters because you need more exposure if you want to build an audience.

Fast way forward, and I have a structure that helps me know my articles are “good enough” within 51 minutes. I follow these exact steps to edit my articles, and when I’m done, I hit publish.

My work will never be perfect. But it’s good, and I can publish more.

Here’s my bulletproof editing process you can follow to save hours of work.


1. You’ll need to pay attention to this (1 min)

If you’d like to get curation on this platform, you have to use the title case format in your headings.

Format your titles with this free app every time you edit your work. Your maximum time investment for this step is 1 min.


2. Be the reader of your work (30 mins)

To put yourself in the reader’s role, read out loud what you’ve written. This way you’ll be able to spot inconsistencies in the flow of your work.

I know it sounds strange. My husband used to laugh at me when I was reading my articles loud at 7 am.

You might feel awkward about listening to your own voice. Maybe you’re insecure about your pronunciation, or don’t want the people around you to hear what you’re working on. It’s indeed hard to push your limits and start doing this exercise, but it’s powerful and will immensely help you.

Delete here everything you don’t need.

Helpful questions you can think about to make your work easier:

  • Do I repeat something? The shorter the better.
  • Does my logic make sense?
  • Is it reasonable for anyone looking at the evidence I’ve provided to come to the conclusion I’ve come to?
  • Is each paragraph/section directly related to the one that comes before it and the one that comes after it? If not, are they separated by a header or divider?
  • Does each paragraph’s opening sentence logically follow the previous sentence’s closing paragraph?

Push yourself to spend no more than 30 minutes on this step. Read your work only once.

This is the most challenging step of the whole editing process, and you might feel frustrated about deleting parts of your article that are close to you. To make this easier, I have my “editing graveyard.” It’s a document where I paste sentences and paragraphs I’d otherwise delete.

Source: Screenshot from the Writing Online Accelerator Module 5

3. Section headings are just like your headline (5 mins)

After you’ve read out loud your work for fluency and clarity, it’s time to take a look at your section headings and improve them.

To hook your readers in, it’s not enough to write great headlines.

Think about each of your section headings as mini titles. You still need to convince your readers that it’s worth their time to keep on reading.

In this part, for example, I could’ve just written: “Improve your section headings.” Instead, I opted for “Section headings are just like your headline” to make the title more engaging.

You can make your section headings more interesting by:

  • Using power words
  • Relying on metaphors
  • Implementing 1–2 of the six headline qualities

In a nutshell, great headlines:

  • Focus on the readers and deliver some benefit — If You Want to Be Rich, Spend Your Time Buying Assets
  • Are broad enough to attract a large audience — 9 Micro-Habits That Will Completely Change Your Life in a Year
  • Enable the reader to share it with others because the article either makes them look smart or helpful — The 7 Emails You Should Send Every Week to Get Ahead in Your Career
  • Bring some novelty in your point of view — Self-improvement has made me worse
  • Display either famous people or self-proof — Elon Musk’s 2 Rules For Learning Anything Faster
  • Evoke emotions — Today I Learned Something About My Boyfriend That No Girl Should Ever Have to Discover)

4. Polish your word choice (4 mins)

The rule of thumb of online writing is: the simpler, the better.

You can unclutter your writing by thinking of these rules:

  1. Active voice instead of passive
  2. Delete the word “that” 90% of the time
  3. Cut adverbs
  4. Simpler words and no jargon
  5. Cut the fluff

To master polishing your word choice, I use this article as a checklist. If you’ve done it a couple of times, you no longer need the article and do it by heart.

Don’t get lost in the details.

Every minute you spend editing, you don’t spend writing.


5. Don’t worry if you aren’t a native (5 mins)

My first language is German. In school, I was a below-average language student. When I started writing I worried my English language skills weren’t good enough to write online.

The thing is, there are countless tools non-natives can rely on to write with flawless grammar. I opted for Grammarly.

The tool improves your writing and helps you learn grammar along the way. I use the paid version, but you can do a lot with the free version already.

You can integrate the free version of the tool into your browser as follows:

First, you want to sign-up.

Source: Screenshot taken by the author

Second, add the extension to the browser:

Source: Screenshot taken by the author

Third, enable writing suggestions for the platform where you write

Source: Screenshot taken by the author

After integrating Grammarly into your browser, go through your text and implement the grammar suggestions. Focus on the correctness category (the red one) and ignore the app’s clarity, engagement, and delivery functions.

Not being a native can also bring benefits. You won’t fall into the trap of crafting fluffy sentences and using overly sophisticated words.


6. Follow the formatting guidelines (5 mins)

Most platforms have some formatting requirements.

Wherever you write, make sure to inform yourself about the formatting rules. You can either do this by observing the pieces and discovering similarities. Or look for the requirements either on the about page, in the submission guidelines, or the FAQ section.

Here’s what you need to pay attention to on this platform. You can read the bullets below or download this cheat sheet as a PDF to always get the formatting right.

Headline Optimization

  • Is your headline appealing enough? Does it make the reader click?
  • Your reader will always consider, “What’s in it for me in the article?
  • Use “You” instead of “I.”
  • No exclamation marks.
  • All initial letters are BIG.
  • Numbers are numerals: “5” instead of “Five”

Subtitle Optimization

  • Always write a subtitle. It can impress your readers and make them click on your story.

The picture

  • Always use an attractive picture as a heading.
  • Make sure it’s a high-quality picture, and you have the right to use it + mentioned the source/owner of the picture.
  • Use horizontal pictures — no vertical photos!
  • Don’t choose the smallest option for images — go for the bigger ones.
The correct formatting of a title, subtitle, and cover image. Source: Screenshot from the Writing Online Accelerator Module 5

Section breaks

Make use of section breaks to divide your post into sub-paragraphs.

Use subtitles

Use T1 and T2 title formatting to properly structure your text.

Use short paragraphs

Short paragraphs ensure a better reading experience. They help you to have more white space in your text, which is also a benefit for the reader.

Quotes

When using quotes, make sure you use the right quote formatting.

The end

Tell your reader what to do or why your post is relevant at the end of your article.

Call-to-Action (CTA)

To build your email list and grow your audience, include a CTA at the end of each post.

For example, the CTA of this article is: Ready to accelerate your writing journey and build an online audience? Subscribe for a free 5-day course on how you can set up the single most important thing writers usually forget to attract a large audience online. With a total time investment of only 20 minutes.

Tags

  • Always use the five tags.
  • Use a mixture of more & less popular tags that represent the topic of your article.
  • Don’t go too niche, and don’t invent your own tags!
  • If your goal is to become a Top Writer on Medium, make sure to use the same tags several times but keep in mind: the tag still. has to be a match for the story.
Source: Screenshot from the Writing Online Accelerator Module 5

Now You

After you finish writing your next article, set a timer to 51 minutes. Try to complete all six editing steps in one go.

Push yourself to read your work only once in each step. It’s hard, but if you’d like to publish more articles, you have to learn to work faster.

The more you’ll practice this, the easier it’ll get.


Before you leave

Now you have a bulletproof editing process you can rely on every time you write an article.

To refresh your memory, these are the steps you’ll want to follow:

  1. Format title in title case (1 min)
  2. Read out loud for fluency & clarity (30 min)
  3. Improve your section headings (5 min)
  4. Polish your word choice (5 min)
  5. Grammarly check (5 min)
  6. Formatting check (5 min)

But your most important takeaway should be to not edit for hours.

Perfectionism in editing can kill your creativity and consistency. It also comes with opportunity costs: the longer you edit an article, the later you’ll start writing a new one.

If you’d like to be a successful online writer, it’s not enough to make people read your work. You need to break free from platforms and build your community.


Ready to accelerate your writing journey and build an online audience?

Subscribe for a free 5-day course on how you can set up the single most important thing writers usually forget to attract a large audience online. With a total time investment of only 20 minutes.

Filed Under: ✍🏽 Online Creators Tagged With: Editing, Writing

6 Principles That Helped Me Write Effective Headlines

July 22, 2022 by luikangmk

Over 2 million people clicked on my headlines after I improved them using these techniques

Photo by 43 Clicks North on Unsplash

If your headline isn’t good enough, no one will read your articles. Your content can be perfect. But you drive the audience into your writing through the title.

No one clicked on my articles in early 2020.

My headlines were as shitty as “The digital gap is increasing — we need to act now!” and “Out of your head and into your body in less than 5 minutes”.

I didn’t think of the reader when crafting my headlines, and I believed recycling older, but well-performing headlines is a great idea. I didn’t put time and thoughts into crafting the heading. Hence, almost nobody clicked on my words.

If you ever want to be a successful writer, you need to start working on your titles. Because if no one clicks on your heading, you’ll always have zero readers.

The good news is headline writing is a skill you can master.

Once you understand the components of successful headlines, you can create your own engaging titles.

But consistently writing headlines that make people click is more complex than you might think. It requires continuous practice and re-learning.

And yet, there are a couple of components that will help you craft titles that make people click. The following tips helped me reach 2 million readers in less than two years.

Considering just half of them, you’re already better off than 90% of all online writers.


Write clearly for the benefit of your readers

Online readers don’t have much time. They need prompt satisfaction and quick solutions.

That’s why great headlines focus on the reader’s benefit. They specifically answer the question: What’s in it for the reader?

If readers click, they’ll get something out of the article.

This seems trivial, but when you look around, you’ll see that most articles neglect the reader’s benefit. They read like journal entries and lengthy life stories where the reader’s benefit is hidden.

How you can apply this:

Every time you write a new story, ask yourself: what’s in it for the reader?

Provide your readers with a specific benefit that can bring transformation to their lives. To give you some concrete examples, the reader’s benefit is crystal clear in these headlines:

  • The Feynman Technique Can Help You Remember Everything You Read
  • How One Year of Microdosing Helped My Career, Relationships, and Happiness
  • The Shy Person’s Guide to Winning Friends and Influencing People

You can be explicit and use the word “you” to state that the article will be about the reader. As an alternative, you can guide the reader through an experience of your life that can help the reader as well.


Find an angle that attracts a broad audience

I love writing about education.

Yet I’m aware that if I write about Estonia’s education system, the article likely won’t go viral. There are simply not enough people who’re interested in the topic to such depth.

If you’d like to attract a broad audience, contemplate the breadth of your writing by considering what other people might find interesting about your chosen topic. While the title should be as specific as possible, it should also appeal to a large audience.

How you can apply this:

When crafting your headline, answer these questions: Why would many readers care? Who is this relevant for? Is my topic broad enough?

These articles appeal to a broad audience:

  • If You Want to Be Rich, Spend Your Time Buying Assets
  • 3 Binge-Worthy Books for Life-Long Learners
  • 9 Micro-Habits That Will Completely Change Your Life in a Year

While, in my case, Estonia’s education system can’t appeal to a broad audience, I can still write about education in a more inclusive way. People want to remember everything they read, and they’d also like to read books from which they can learn.


People only share specific kinds of articles

Would you share an article titled “How I Overcome My Emotional-Insecurity” on your LinkedIn or Facebook profile?

People only share stuff on the internet that makes them look smart or helpful.

If your article has the shareability quality, it’s more likely to go viral. Because if people share your work, more people will read it, and more people will share it.

How you can apply this:

Think about: Which angle is share-worthy for your readers in your article?

To make your readers look smart and/or helpful, craft headlines where you solve a specific problem for them. If the solution is useful, they’ll happily share it with their friends and colleagues.

You don’t need to solve the biggest life challenges of the readers. It’s enough if you can help them declutter their mailboxes.

These articles, for example, are broadly shared on the internet:

  • These 3 Practices by Bill Gates Will Change How You Read
  • The 7 Emails You Should Send Every Week to Get Ahead in Your Career
  • 11 Things Socially Aware People Don’t Say

Don’t copy the past. Share your spiky point of view instead

The reason why re-using old headlines most of the time can’t work is the lack of novelty.

What went viral last year won’t be popular this year. People want to read stories from angles they’ve never seen before.

To avoid repeating what has been said before, add your spiky point of view to the title.

As Wes Kao explains, a spiky point of view is someone’s unique, slightly controversial perspective that others can disagree with. It lays outside of the mainstream and brings fresh ideas to the conversation.

You can think about your spiky point of view as the unique way you see the world.

How you can apply this:

To discover your spiky point of view, ask yourself:

  • What is something I strongly believe but others might disagree with?
  • What do most people like but I can’t stand?
  • What is something that I stand by but isn’t (yet) accepted by the society?

You could also use structures such as:

  • Most people think X, but it’s actually Y
  • How I got Y (desirable result in your industry) without Z (conventional advice)

These headings did a great job at adding novelty to the conversation:

  • Self-improvement has made me worse
  • How I Quit Coffee After 15 Years Of Daily Consumption
  • My Life Became Richer the Day I Stopped Chasing Passive Income

Build on other people’s credibility

If readers recognise well-known names in a title, they’re more likely to click because those people already have expertise in their fields.

Readers didn’t know me when I had my first viral article, but they were for sure aware of Bill Gates. The advice came from him and not from me.

Yet, if you have a unique experience that can be useful for others, you can also add “self-proof” to your heading. Whether you built up a career, skipped coffee entirely, or just learned how to meditate and stuck to your practice for years, you can add self-proof to your work.

How you can apply this:

Rely on well-known names, or add self-proof if you’re an expert in the topic you write about.

To help your thinking, here are a few examples:

  • Tim Ferriss’s Recent Change of Heart Shows How Self-Improvement Can Fail You
  • Elon Musk’s 2 Rules For Learning Anything Faster
  • This is How I Made My First $30,000 From Writing Online
  • 12 Months Ago I Drank Ayahuasca — Here’s How My Life Has Changed Since

You’ll write great headlines if you do this one thing

People also click on a headline if it awakens emotions in them. Whether it’s curiosity, anger, or joy, if you can make others feel a certain way when they read your headings, you can also make them click.

This component is tricky, though. Be aware that half of your readers won’t like what you share if you’re controversial. Prepare that they won’t return and might leave angry comments under your work.

Feelings are powerful. Be aware of which emotions you want to transmit.

How you can apply this:

Use power and emotional words in your headings, such as:

Source: Coschedule

To give you some concrete examples, these articles awaken emotions:

  • An Elderly Mathematician Hacked the Lottery for $26 Million
  • Today I Learned Something About My Boyfriend That No Girl Should Ever Have to Discover
  • If Women Don’t Want To Be Treated as Sex Objects, Why Do They Dress Provocatively?

What to Keep in Mind

Writing great headlines is complex. Unfortunately, you likely won’t get it intuitively right; you need to learn about titles, and then you need to practice writing them.

And headline practice requires a lot of practice. That’s why we spend an entire 1.5-hour live session on headline practice in my online writing course.

To refresh your memory, these are the six components that make people click a headline:

  1. Reader first
  2. Breadth
  3. Shareability
  4. Novelty
  5. Social proof
  6. Provoke emotions

Don’t feel overwhelmed. Even though it’s challenging, headline writing is also a skill you can master.

For a start, focus on 1–2 components depending on what you write about. You got this.


Ready to accelerate your writing journey and build an online audience?

Subscribe for a free 5-day course on how you can set up the single most important thing writers usually forget to attract a large audience online. With a total time investment of only 20 minutes.

Filed Under: ✍🏽 Online Creators Tagged With: advice, Editing, Ideas, Writing

How to Master the Most Important Yet Underrated Writing Skill

July 21, 2022 by luikangmk

Write headlines that make people click on your work

Photo by Christin Hume on Unsplash

People don’t click on boring headlines.

You can have the best content ever; if your title isn’t convincing enough, it’ll never get the attention it might deserve. Too many great articles are lost because of a poor headline.

If you want yours to stand out, you must start practising headline writing.

I’ve recently written about what qualities great headlines have in common. But this article will be about how you can master the skill of headline writing. Because it’s not enough to understand what a great headline can look like. To improve, you need to learn how to craft them by yourself.

So here’s how.


The exact flow of your complete headline practice

At the beginning of my journey, my headlines sucked.

No wonder I didn’t have many readers.

But once I started to put more time into my headline practice, this is what happened:

Source: Screenshot from the Writing Online Accelerator Module 2

To get better in any skill, you need to practice it.

As Ayodeji Awosike put it:

I’ve written more than 15,000 headlines since I’ve started writing. Only one per cent of them are really good. Those one per cent of headlines I’ve written created 100 percent of my viral successes. Every single morning, I write down 10 ideas for headlines. […] I promise, if you don’t learn how to write good headlines, you’ll never have a career as a blogger. Never. So do I.


How and where to craft spiky headlines

There’s no secret sauce for headline writing: you need to put some work in.

From now on, try to craft ten headline variations for each article you write. This way, you train your mind to create headlines, and you’ll inevitably get better at it.

Implement 2–3 headline qualities into each of your titles.

In a nutshell, great headlines:

  • Focus on the readers and deliver some benefit — If You Want to Be Rich, Spend Your Time Buying Assets
  • Are broad enough to attract a large audience — 9 Micro-Habits That Will Completely Change Your Life in a Year
  • Enable the reader to share it with others because the article either makes them look smart or helpful — The 7 Emails You Should Send Every Week to Get Ahead in Your Career
  • Bring some novelty in your point of view — Self-improvement has made me worse
  • Display either famous people or self-proof — Elon Musk’s 2 Rules For Learning Anything Faster
  • Evoke emotions — Today I Learned Something About My Boyfriend That No Girl Should Ever Have to Discover

You can write your headlines on a sheet of paper, in Trello, in an excel sheet, or in any other place you feel comfortable. Opt for a tool you’ll want to rely on every single time you sit down to write.

I use RoamResearch for my headline practice. This is what it looks like.

Source: Screenshot from the Writing Online Accelerator Module 2

When you’re ready with your ten headline variations, choose the one you’d click on.

The thing is, the practice isn’t as easy as it sounds. You’ll get frustrated by not having enough headline variations. You might see that your titles suck. You might want to stop the practice. And your feelings are valid.

But practicing is the only way to improve. Writing ten headline variations for each article enables you to grow exponentially. While most people will write only ten headlines for ten articles, by that time, you’ll have written 100 titles.


Get more eyes on your work

If you’ve written many headlines and struggle to choose the best, you can ask for some help. Don’t hesitate to share your work with some friends, family members, and also fellow writers.

You can even organize a slack group for headline practice. In the Writing Online Accelerator, my students form groups even after the course and work together.

When I started to write, I did the work for myself. I wrote to fellow writers, and we started a Slack group for accountancy and writing practice. Every time I struggled with my headings, I asked my peers what they thought:

Source: Screenshot from the Writing Online Accelerator Module 2

The only tool you need to master headline writing

In the last step of your practice, you’d want to further improve the headline you’ve picked. You can do so by replacing words with synonyms or adding power words, such as genius, unexpected, mind-changing, and so on.

CoSchedule will help you with this. (No need to buy the full version).

The platform analyses your titles and gives you a score. Anything under the score of 70 needs more work. Above 70, you’re good to go.

All you need to do is copy-paste the headline of your choice to the “Write your headline here…” window. If you’re not yet content with the outcome, add the updated version of your heading to the same place and reanalyze it.

The free version of CoSchedule is more than enough. You don’t need to subscribe to the pro version.

To show you an example, the title below says, “This mind-changing concept shows it’s never too late to become your best self.” I’ve got a headline score of 74, which is good, but it can still be better.

An alternative, “This mind-changing discovery shows you’re never too old to become your best self,” already has a score of 75. With one more tweak, “This mind-changing discovery shows you’re never too old to become better,” the score is 76.

Yet, if you don’t like the version that has only a slightly higher score, you can still decide on a headline with a lower score, given that it’s above 70.

Source: Screenshot from the Writing Online Accelerator Module 2

Don’t stop here

Your writing starts with the headline. You convince people to click on your work with the headline. Then you hook them in with your introduction and main part.

But you encourage them to stay and come back for more with your Call-to-Action at the end of each article.

Yet most writers don’t have a CTA and don’t start building an email list from day 1. They lose hundreds of readers who’d be genuinely interested in their work.

In this free 5-week course, I exactly show you how you can set up your writing for audience growth.


Remember the essence

Writing great headlines takes time and practice.

To create outstanding titles, you’ll need to spend more quality time with your potential headlines.

You can apply this by getting a sheet and adding ten headline variations for each of your articles. The practice is hard. Whatever you feel, your emotions are valid.

If you want to take your practice one step further, ask for the opinion of others. You can do so in a slack group or via 1-on-1 messaging.

Improve and finalise the best title version with CoSchedule.

Without great headlines, you’ll have a hard time attracting readers.

But if you put in the work and practice, you’ll be ahead of 90% of the bloggers.


Ready to accelerate your writing journey and build an online audience?

Subscribe for a free 5-day course on how you can set up the single most important thing writers usually forget to attract a large audience online. With a total time investment of only 20 minutes.

Filed Under: ✍🏽 Online Creators Tagged With: advice, Editing, Writing

How the Meta Log Can Turn You Into a Better Writer

October 18, 2021 by Eva Keiffenheim


Steal my tool to build a consistent, deliberate writing habit.

All you need are four columns. Source: Canva.

When I started writing, it felt painful. I didn’t know how to write introductions and struggled to express my ideas. I thought my texts sounded trite (which they did), and I knew I was not as effective as I could be.

I almost stopped writing altogether.

Fast forward, and I’ve built a consistent writing habit and reached more than two million readers through my articles and newsletters.

If I had to name one tool that has kept me going and improved my writing it’s the meta log. It will support you in establishing a deliberate, consistent writing practice that will turn you into a better writer.


The Science Behind the Meta Log

I invented the tool out of necessity and only recently understood why it works. The meta log is rooted in metacognition. It’s a skill essential for learning, according to many educational scientists.

Different studies show high performers have better metacognitive skills than low performers across various disciplines. Educational psychologist Schraw writes:

“Metacognition is essential to successful learning because it enables individuals to manage their cognitive skills better and to determine weaknesses that can be corrected by constructing new cognitive skills.”

But what is metacognition?

In essence, it means noticing and understanding the way you think. It’s thinking about thinking, knowing about knowing, or becoming aware of your awareness.

When it comes to learning, educational scientists say: “It refers to the processes used to plan, monitor, and assess one’s understanding and performance.”

Here’s a visual explanation:

Metacognition Cycle. (Source: Abhilasha Pandey on the progressive teacher).

“The best performers observe themselves closely. They are in effect able to step outside themselves, monitor what is happening in their own minds, and ask how it’s going.”

— Geoff Clovin


How to Quickly Set Up Your Meta Log

According to research, three steps are necessary for unlocking your metacognition: planning, monitoring, and evaluating.

Before you start writing, plan. You first think about your desired goal and consider how you’ll use your time.

Second, you can use self-monitoring to remain aware of your progress. You question the steps you take and reevaluate whether you’re following your planned path.

Finally, you want to reflect on your performance. You evaluate what went well and what you can do better next time you sit down to write.

To integrate this into your writing habit, all you need is a journal or spreadsheet with four columns.

  1. The first column is for the date.
  2. The second column is for the duration of writing.
  3. The third column is for planning and self-monitoring.
  4. The fourth column is for evaluation.
Source: Created by the author.

When you fill out the columns before and after your writing practice, you use your experience to regulate and improve future learning behavior. You self-monitor and self-regulate. Thereby, you steepen the learning curve towards your desired goals.


The 3 Principles to Make the Most of It

This meta log is a variation of learning journals, which have been proven to enhance meta-cognition.

“However, how the learning journal is used seems to be critical and good instructions are crucial; subjects who simply summarise their learning activity benefit less from the intervention than subjects who reflect about their knowledge, learning, and learning goals,” this meta-analysis in Nature concludes.

To make this practice effective, keep these three principles in mind.

1) Fill the blanks without a reader in mind.

Contrary to your articles, you don’t write for any reader. The meta log is for you. Don’t obsess over word choice. Nobody will ever read it, and it’s only there for you. The more honest you are with yourself, the more helpful it’ll be.

2) Use it every time you write.

Unused tools are useless. The meta-analysis in Nature says the longer you stick with a learning journal, the more effective it is. Strong effects have been observed among students in the context of writing.

Make it a habit to finish your writing with an entry in your meta log. Specify the next step for tomorrow.

3) Bold your key insights.

At the end of a month, go through your meta log and bold your key learnings. That way, you’ll have an easy time revisiting the critical lessons from the past and bring them back to your mind.

Here’s how my meta log from April 2020. I still keep coming back to the highlights once in a while.

Source: Created by the author.

In Conclusion

If you want to become a great writer, consistency matters most.

The meta log keeps you motivated, shows your progress, and helps you move in the right direction. This tool will help you be more effective by including metacognition in your writing process.

Are you ready to set it up?


I’m building a course on how to write online based on evidence-based practices to make the most of your time. You won’t sit in front of pre-recorded videos and struggle to stick with them. If you’re interested in joining a group of 25 people, you can pre-register here.

Filed Under: ✍🏽 Online Creators Tagged With: Editing, Writing

Stephen King’s 8 Tips Can Improve Your Writing and Editing

March 30, 2021 by Eva Keiffenheim


A guide from one of the greatest authors.

Photo Credit: Wikimedia Commons, edited by Author

For the last 12 months, I’ve been absorbing advice from world-class writers.

One of the most useful books I read is Stephen King’s On Writing. He describes his writing journey and applicable lessons he learned along the way.

To date, King published 62 novels and is among the richest authors of our time. Here are his best tips.

1. You can learn only by doing

“You don’t need writing classes or seminars any more than you need this or any other book on writing. […] You learn best by reading a lot and writing a lot, and the most valuable lessons of all are the ones you teach yourself.”

— Stephen King

Every successful writer follows a writing schedule. King writes every morning. But the time doesn’t matter. What matters is that you sit down and write.

I read his book, searching for a secret sauce. But there’s none. If his success teaches us one thing, it’s that there are no shortcuts. You have to read a lot and write a lot.

2. Use rejections as resilience practice

“By the time I was fourteen (…) the nail in my wall would no longer support the weight of the rejection slips impaled upon it. I replaced the nail with a spike and went on writing.”

— Stephen King

As a young boy, King put the nail in his wall to collect the publisher’s rejection slips. But he didn’t look at it and feel discouraged. Instead, he used these slips as reminders for trying harder.

We all face rejection and failure. What differentiates the mediocre from the most successful writers is they never stop. Rejections don’t matter. But our reaction does.

Whenever you read a publisher’s ‘no,’ remember young King. Persistence ultimately pays off.

3. You should be the only person to judge your work

“I kept hearing Miss Hisler asking why I wanted to waste my talent, why I wanted to waste my time, why I wanted to write junk!”

— Stephen King

A movie inspired King to write his first commercial stories. After a cinema visit, he summarized the thriller on paper. He then printed the story and sold copies at his school. Another time, he wrote some not-so-kind words about one of his teachers for the school paper.

Both times teachers denounced his writing. They asked him to stop. When he didn’t, they sent him to work for a journal. King’s first paying job as a writer was the sports paper for a small-town.

Based on the teacher’s words, he depreciated writing horror stories. He thought of them as something serious people don’t do. Yet, he trusted his instincts and continued. If King followed his educator’s advice, he would have never become a world-class author.

Don’t stop because other people tell you to quit. There’s only one person who should choose what to do — you.

4. Treasure your relationships

“Writing is a lonely job. Having someone who believes in you makes a lot of difference. They don’t have to make speeches. Just believing is usually enough.”

— Stephen King

Carrie is King’s first published novel. But when he wrote the first pages, he didn’t like what he saw and tossed them into the bin. His wife found the pages. She was curious how the story of the 16-year-old girl with telepathic power would continue and urged King to continue.

Your loved ones believe in you when you fail to believe in yourself. Relationships provide crucial mental support for writers.

5. Master the art of deep work

“There should be no telephone in your writing room, certainly no TV or videogames for you to fool around with. Eliminate every possible distraction.”

— Stephen King

Cal Newport wasn’t born when King published his first novels. But likely, King’s work routine served as inspiration for ‘Deep Work.’

He creates a distraction-free environment. He banned his telephone, TV, videogames, and even YouTube from his writing space. That’s how King writes 2,000 words a day. He creates a 180,00 words novel in three-months.

If you get three focused hours of uninterrupted creation time, you solve most of your time management issues. Because once you’re in deep work and focus for an extended period, you immerse yourself in the activity in front of you.

When I write an article with LinkedIn open and my phone within reach, it takes me 5–6 hours. When I’m undistracted, I finish in 2–3. The equation is as follows:

High-Quality Work Produced = (Time Spent) x (Intensity of Focus)

6. Diffused thinking is as important as focused thinking

“Pow! Two unrelated ideas, adolescent cruelty and telekinesis, came together, and I had an idea.”

— Stephen King

To tackle any large task, our brains use the diffuse and focused mode. They have different purposes and to do your best work you need both of them.

We often optimize our days for focused mode thinking, for example, through deep work, flow states, and other highly productive sessions. Much of the learning process happens in this focused mode of thinking.

Yet, the diffuse mode is equally valuable. It only occurs when our minds can wander, e.g., during taking a shower or going for a lonely walk. Without actively thinking, our subconsciousness works on problems. While we feel like taking breaks, our mind continues to work for us.

King shares that the best novel ideas occurred to him while showering, driving, and taking his daily walk. Give your mind regular breaks. Your creativity will thank you for it.

7. 2nd Draft = 1st Draft — 10%

“The shorter the book, the less the bullshit.”

— Stephen King

On one of his rejection slips, an editor gave him invaluable advice. He wrote to him: “You need to revise for length. Formula: 2nd Draft = 1st Draft — 10%.” Here are some easy fixes for how to do it:

  • Replace adverbs with stronger verbs: The women said silently. → The women whispered.
  • Delete unnecessary “that’s” whenever you can. He feared that his brother loved the sandwich. → He feared his brother loved the sandwich.
  • Exchange nouns for verbs: He made the decision to meditate daily. → He decided to meditate daily.

Kill needless words and shorten long phrases. Or, as King says: “Kill your darlings, kill your darlings, even when it breaks your egocentric little scribbler’s heart, kill your darlings.”

8. Use the first words that come to your mind

“One of the really bad things you can do to your writing is to dress up the vocabulary, looking for long words.”

— Stephen King

It’s tempting to dress up your vocabulary. But when we try too hard, our writing becomes unnatural. It might even feel unrelatable.

Don’t disguise your language. Don’t obsess over the thesaurus for unnecessary fluff. The first word that comes to your mind is most often also the best one.

The best writers I know don’t try to sound intelligent. They use simple words in powerful ways. Whenever you catch yourself searching for ‘professional’ words, stop. Instead, use the vocabulary that first comes to your mind.


Want to learn more in life? Sign up for the learner’s letter.

Filed Under: ✍🏽 Online Creators Tagged With: Editing, Writing

How a Leftover Graveyard Will Make You Edit Without Mercy

September 7, 2020 by Eva Keiffenheim


A simple tool for producing clear, dense, and solid writing.

Photo by Anna-Louise from Pexels

The first draft of anything is always shit, Hemingway used to say. And as a writer, your own experience will attest to the quote’s truth.

You know you need to be a merciless editor to get the best out of your articles. To seduce your readers, you need to distill the quintessence of your writing.

Yet, most of us are lousy editors. We’d rather clinch to the clutter in our pieces than deleting parts of our creations.

Humans avoid pain, so it’s natural we desist editing. It hurts. Deleting the words you carefully put on the paper feels like cycling backward.

There are two options to ease the ache. You‘re either fortunate enough to afford an editor or using a leftover graveyard.

I used the latter for my past 39 Medium articles. 35 were curated and resulted in over $4k Medium Partner Program income in August alone.

And as I feel much of the article’s performance is attributed to my leftover graveyard, I want to share this simple tool with you.

In the following lines, you’ll learn what it is and how you can set up your own.

What is a Leftover Graveyard

A leftover graveyard is a fancy name for a simple text document. It’s an archive containing every phrase that wasn’t good enough to remain in your piece but was too beautiful to be deleted.

A leftover graveyard’s sole purpose is to store all words and sentences you’re hesitant to delete. You cut out all fluff from your original piece and bury it in your graveyard. You’ll remove all the clutter as all your semi-rare sentences move to the document. Thereby, your leftover graveyard will make your writing more clear, dense, and solid.

It’s a psychological trick. You delete your words without deleting them forever. In case you miss your words or want to reuse them for other articles, you know where to find them.

I started with one big graveyard, but as I love to scroll through the graveyard’s to find inspiration, I split them into three different ones. I have one for business, one for love, and one for education.

Pictured by Author

How to Set Up A Leftover Graveyard

You don’t need any fancy tools to make your own one. All you need is a simple text document. I use a google sheet because the cloud makes it accessible from anywhere.

Here’s how my business graveyard looks from inside the document. You see sentence fragments that I cut off from writing a piece on spending less time on your phone.

Pictured by Author

Once you have the document set up, you’re ready to use it for your editing process.

How to Use It to Edit without Mercy

Your editing graveyard will fill with your first round of editing. That’s when you’ll start to burry your words. Every time you go over a written piece to improve it, open your leftover graveyard.

With every passage, ask yourself: Does this add value for the reader?

If the answer is yes, keep what you wrote. If the answer is nay, move sections or words to your graveyard. Every time you doubt whether you should delete a sentence, cut the sentence out, and paste it into your leftover document.

In case you miss the cutout part, you’ll be able to copy it back to your text anytime. When you feel something should be added, revisit your graveyard and take back sentences that add value for your readers.

Moreover, you can use this graveyard as inspiration when you’re crafting a new piece. I love to scroll through my leftover graveyard from time to add article ideas to my Trello board or to reuse sentence structures I haven’t used so far.

Final Words

Excellent writing requires ruthless editing. Using a leftover graveyard has helped me to make a full-time income from my writing. If that’s your goal, I hope this simple trick does the same for you.

By editing with a leftover graveyard, you’ll have the quintessence left. Your readers will want to read your articles until the end. Your writing, your rules. Use whatever works for you. Ultimately, you determine which process elevates your written words.


Do you want to stay in touch? Join my E-Mail List.

Filed Under: ✍🏽 Online Creators Tagged With: Editing, Writing

Footer

Categories

  • ✍🏽 Online Creators
  • 🎯 Better Living
  • 📚 Knowledge Management
  • 🧠 Learning Hacks
  • 🧱Transforming Education

Learner’s Letter

Sign Up for the free weekly newsletter to make your mind work for you.

Copyright Eva Keiffenheim © 2023 · Impressum