Take smart digital notes with the Zettelkasten approach.

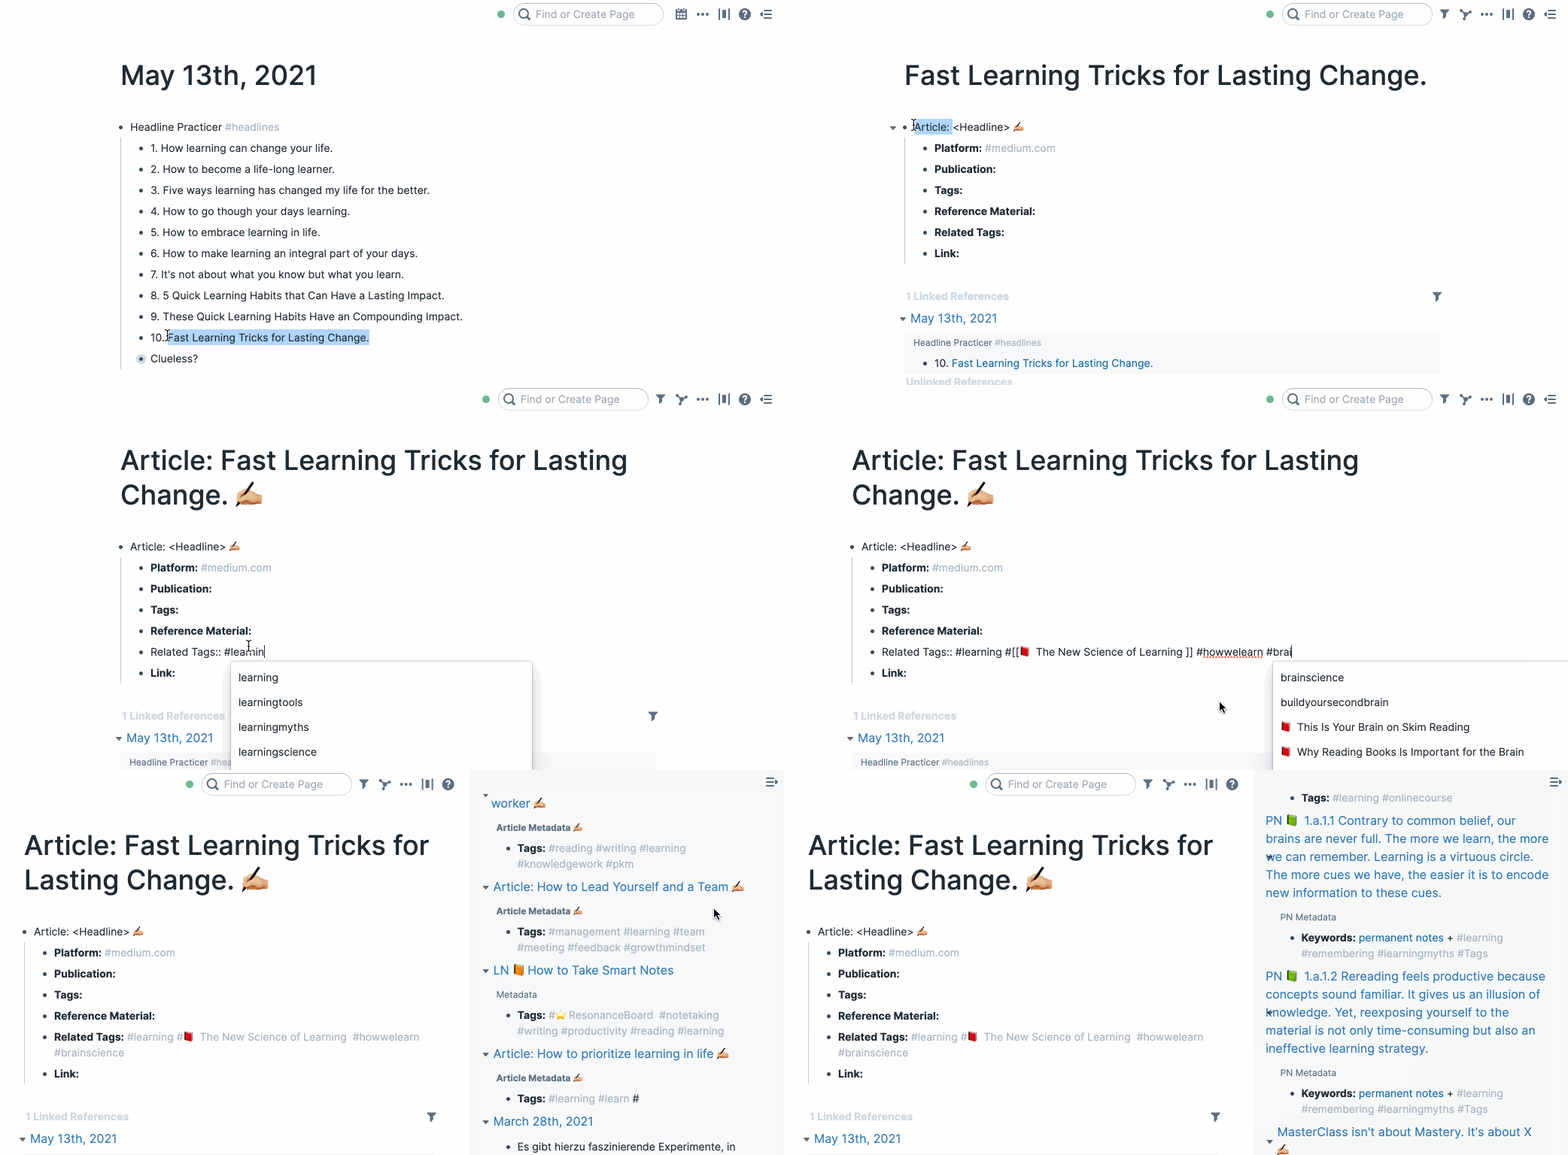
I recently switched to Obsidian because it beats RoamResearch in terms of speed and data privacy.
Similar to Roam, Obsidian is a note-taking software many people use for knowledge management.
While both tools use markdown and share some functionalities, they look and work differently.
Here are the first five steps I took to set up my slip-box (aka Zettelkasten) in Obsidian.
1) The basic commands you want to know
In your left panel, you can create a new folder and a new note.
For formatting your notes, there are a couple of commands you might want to keep in mind.
For writing italics, utilize the *this* or _this_ command. For bolding the text use a double combination like ** this** or __ this__ .
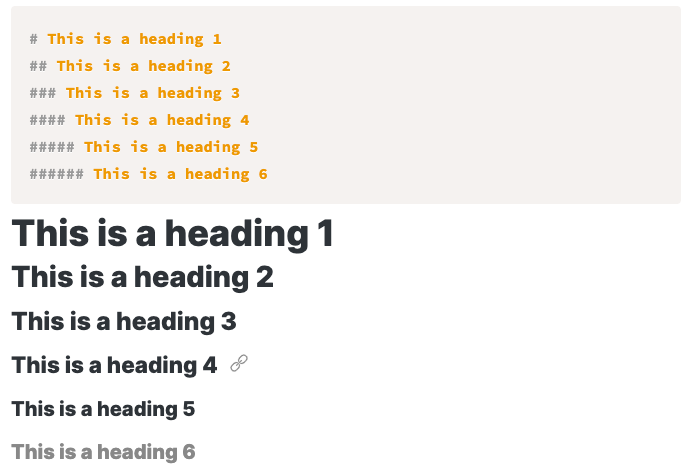
Hashtags set the size of your heading. Make sure to include a space after the hashtag otherwise you create a tag.
The last basic command you need is the [[ ]] for linking. Similar to Roam, Obsidian will create a new note out of an existing note, if you bracket a word or sentence. Yet, you need to click on the bracketed word to actually create the note. You can also use files and links and tags and embed notes in others.
2) Create the templates for different notes
To quickly create the three different Zettelkasten note types, you want to use templates. Here’s a quick recap about the different types of notes in a Zettelkasten:
- Fleeting Notes: Fleeting notes are ideas that pop into your mind as you go through your day. They can be really short, just like one word. You don’t need to organize them.
- Literature Notes: You capture literature notes from the content you consume. It’s your bullet-point summary from other people’s ideas. I create these notes for all books, podcasts, articles, or videos I find valuable.
- Permanent Notes: When you create permanent notes, you think for yourself. In contrast to literature notes, you don’t summarize somebody else’s thoughts. You don’t just copy ideas but develop, remix, and contradict them. You create arguments and discussions. By writing your idea down, you put pressure on your thinking and transform vague thoughts into clear points.
In Obsidian, templates work differently from the ;; command in Roam. But once you set it up it’s quite intuitive.
First, you create a new folder and call it “Templates”. Then, head to “Settings” on the bottom left corner, select “core plugins” and enable the Templates.
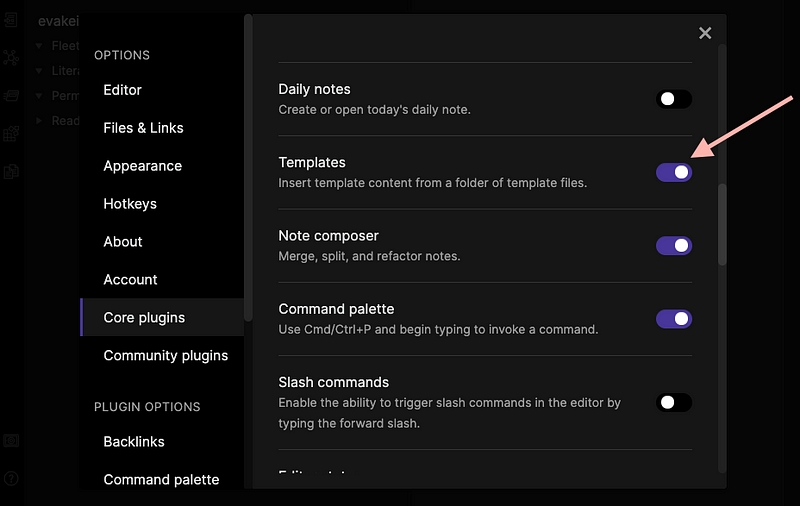
Lastly, head back to the settings, scroll to the very bottom, select “Templates” and assign the Template folder location to your newly created page “Templates.”

Next, you can create templates for your literature notes and your permanent notes. Depending on your preference and slipbox structures, yours might look different.
Here’s how I set up mine: Similar to my Roam Zettelkasten, I use an orange icon for literature notes and a green book icon for permanent notes. Here’s the exact structure:
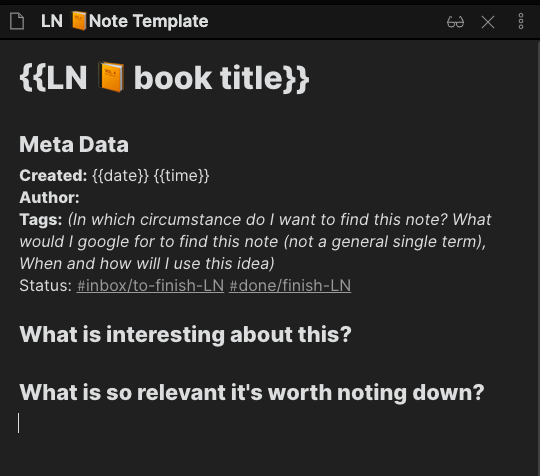
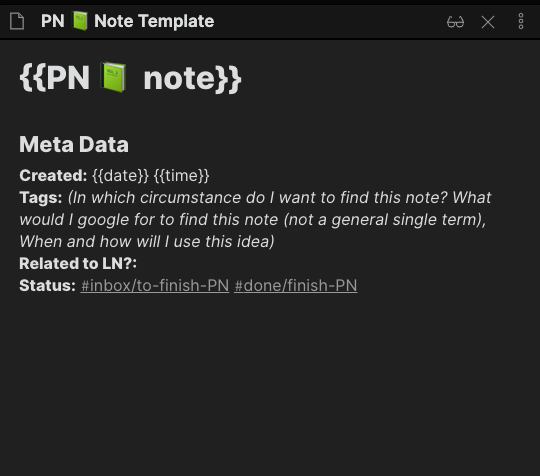
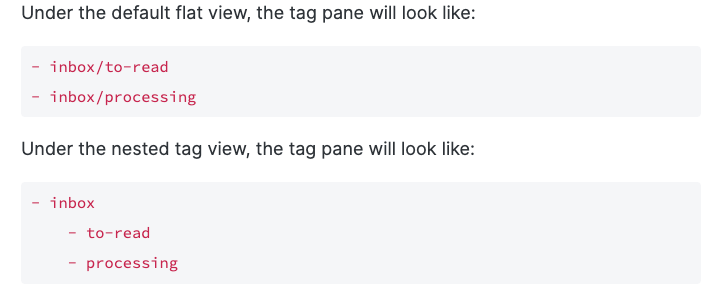
The nested tags in the status help me see items I have to finish as a tree instead of a flat list.
3) Set up your slipbox structure
Next, you might want to set up three new folders: one for your fleeting notes, another for your literature notes, and one for your permanent notes.
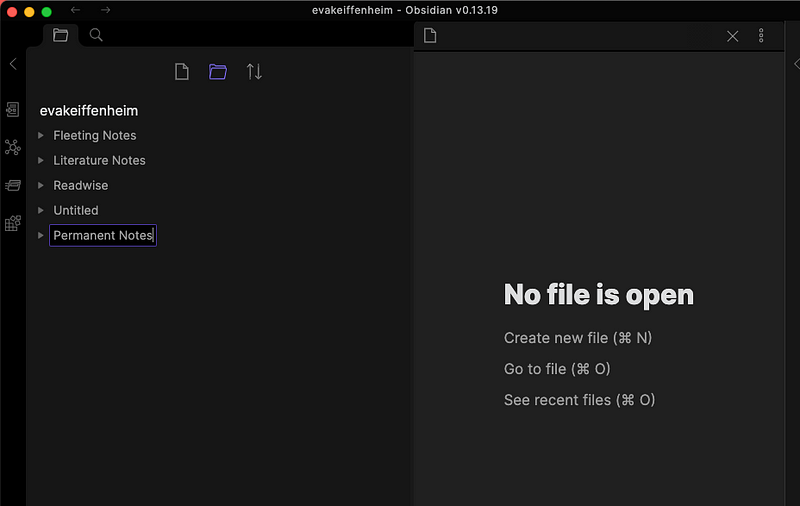
The fleeting notes will serve the same function as my default option for noting down any atomic idea or note.
The literature notes are the highlights imported from Readwise (more on that in the next steps) with additional notes. The permanent notes folder contain my original writing.
I don’t use a content map and I’m not planning to number the notes. I used to do this in RoamResearch but it has been slowing me down and I don’t see many benefits.
4) Connect Readwise to Obsidian
Readwise was the superpower behind my Zettelkasten in Roam and will hopefully remain the superpower in Obsidian as well.
In essence, it is a service that imports all your highlights (e.g. from books, kindle, Twitter, podcasts, medium articles, browser) and exports them in a customized format to your note-taking tool (e.g. Notion, Roam, or Obsidian).
I see it as my personally curated search engine. It contains all highlights from the past 100 books and 1000 articles I read and highlighted within the last two years.
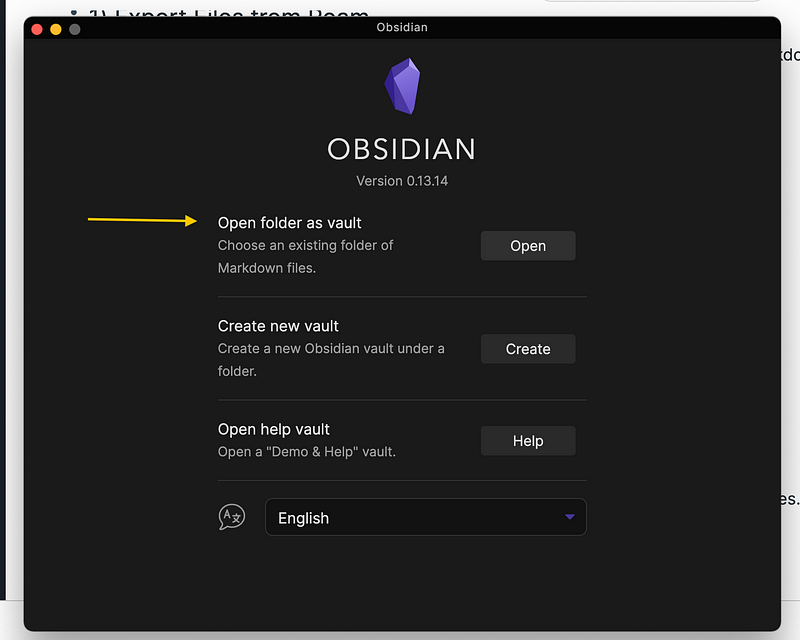
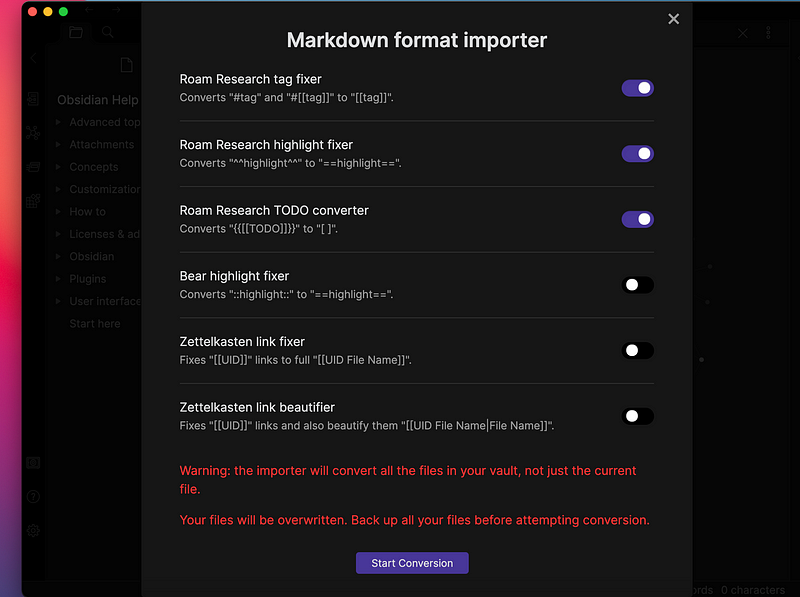
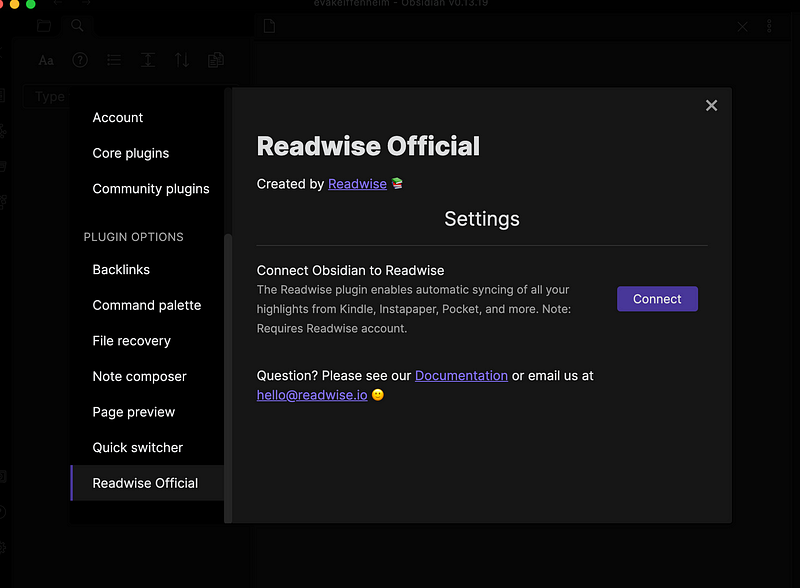
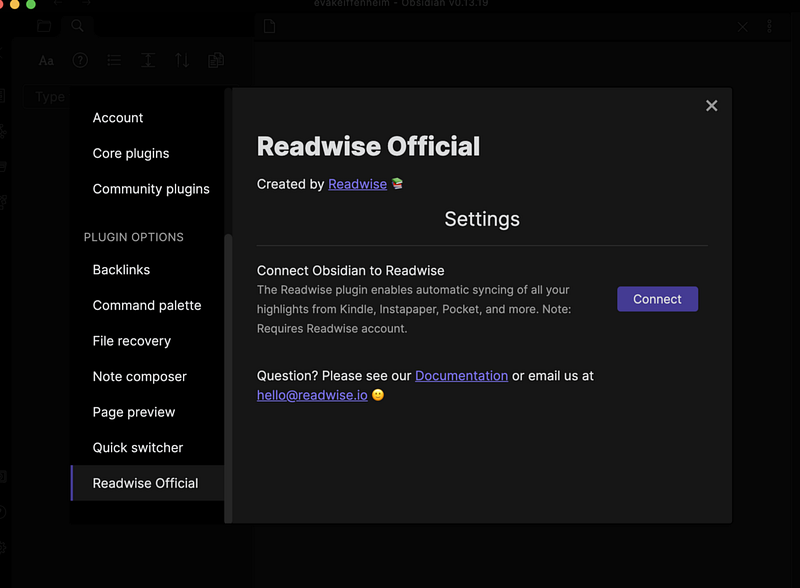
To connect Readwise to Obsidian, you want to launch your obsidian vault, click on settings, select “community plugins” in the left panel, and toggle off Safe mode.

Then, search for “Readwise Official”, click install and enable. In the panel, scroll down to “Readwise Official” and click on connect. Weirdly I had to wait for around two days until the import was fully functioning.
5) Create a workflow that works for You
The most sophisticated tool is useless until you integrate it into your processes.
In the beginning, you might ask yourself whether you’re doing it right. The setup options you have with tools like Obsidian can distract you from actually using them.
With 25 core plugins, 439 community plugins, and 113 themes, plus custom styling, you can adapt Obsidian to work and look exactly to your needs.
One thing that has helped me is not worrying too much about the perfect structure. The researchers who digitized Zettelkasten’s inventor’s notes found inconsistencies in his labelling and interlinking — his Zettelkasten was far from perfect and still made him one of the biggest scientific contributors of his time.
Start using Obsidian and you will soon discover whether you need more functionalities or a better design. There’s still much to discover and I’m excited about the features it offers.

