And transform your personal knowledge management.

Roam is an online workspace for organizing and evaluating your knowledge.
Unlike linear cabinet tools, Roam allows you to remix and connect ideas, where each note represents a node in a dynamic network.
Just like Excel, Roam has a low floor but a high ceiling. You can use Excel for simple things like a grocery list, or you can run your entire business from one sheet.
Roam’s strategy is to attract people who are willing to invest time using a power tool. And the effort is worth it.
Once you know your way around Roam, you’ve unlocked the best tool for knowledge management. This article will teach you the first five steps to get started.
Step 1: Learn the most important shortcuts
Don’t waste your precious lifetime by navigating with your mouse.
With shortcuts, you’ll bring a 3-second action down to a 1-second. And because you repeat those actions hundreds of times each week, you’ll save hours. These are the Roam Research shortcuts I use every day:
- [[ or # → Reference or create a new page
- ⌘+ opt + 1 → Heading 1
- ⌘+opt + 2 → Heading 2
- shift+click → open page in the right sidebar
- / → Show quick commands
- tab → Indent block
- shift + tab → unindent block
- ⌘+ u → find or create a page
- three formatting shortcuts:

How to apply this:
Within your first week, force yourself to use the shortcuts instead of using your mouse. While this will feel slow first, you’ll soon save hours every week.
Step 2: Always start on the daily notes page
Every time you open Roam, you will find yourself on the Daily Notes page.
Think of it as your entryway to work on your personal knowledge management system.
There’s no reason to be afraid of the missing folder structure — networked note-taking accelerates your learning. Here’s why.
Networked thinking includes interactions and relationships between thoughts. Because you don’t have to decide for parent topics, you’ll stumble upon interrelated ideas.
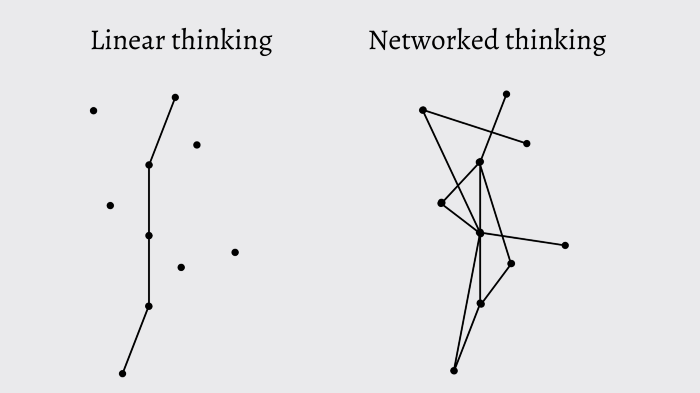
By seeing your daily notes page first thing whenever you open your Roam Research graph, you can focus on your thoughts and ideas instead of wasting brainpower on storage structure. In Roam Research, information is fluid and interconnected.
How to apply this:
Whenever you take a note on your daily page, make sure to add a label. For example, if you capture an idea relevant to one of your projects, add a hashtag with your project label and another one for the topic.
The next time you’re looking for your thoughts on the project, all you need to do is use ⌘+ u to see all your ideas in a single place.
Step 3: Unlock the power of bidirectional linking
You can create new pages with brackets [[]] and hashtags #.
Both commands have the same function, but they look different. You can use either one. All pages are tags, and all tags are pages. Here’s what it looks like:
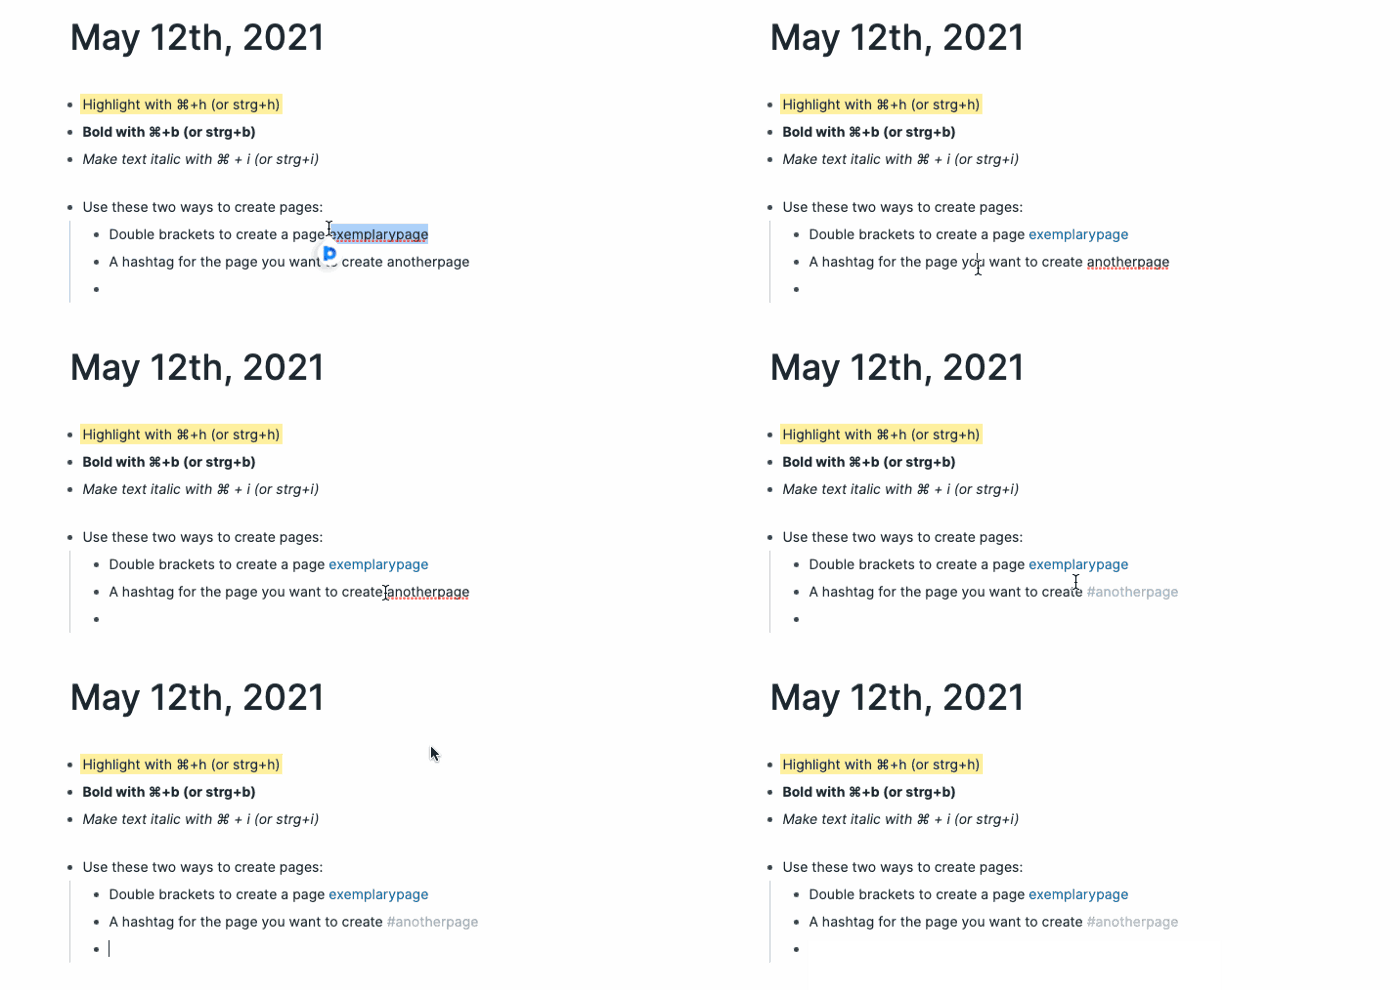
Here’s an example of how you can use it on your daily page: I have a page called [[quote]] where I collect my favorite quotes. This morning, I saw a quote I liked and typed it into my daily notes. I added #quote behind it. When I now click on #quote (or [[quote]]), it shows up with all the other quotes I labeled with this tag.
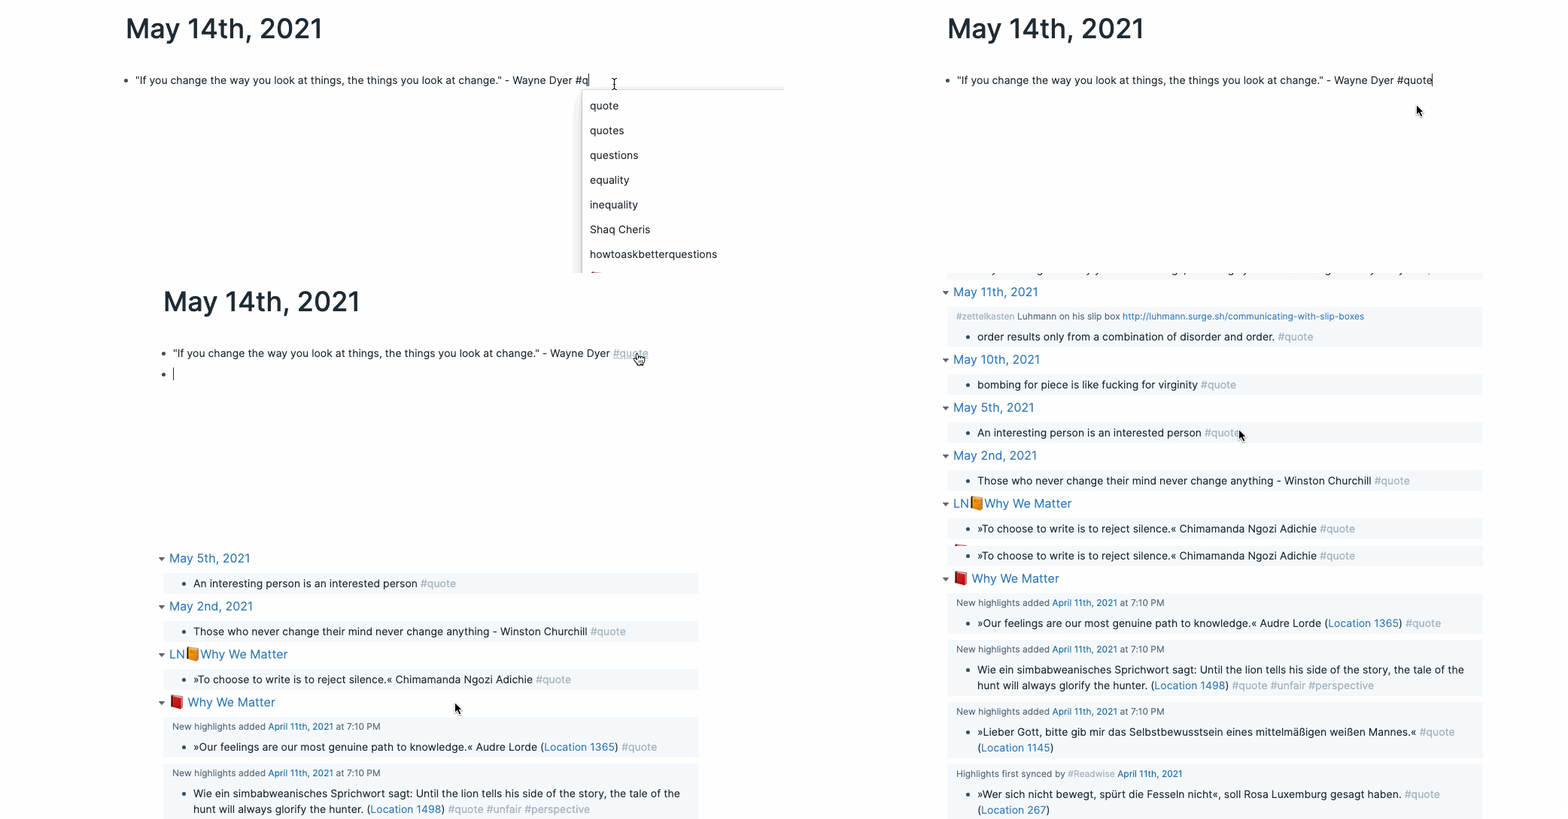
Plus, what makes pages even more powerful is that Roam suggests links you haven’t referenced. So when I click on the “Unlinked References” on my [[quote]] page, I see potentially related bullets and can add them to my page by clicking “Link.”
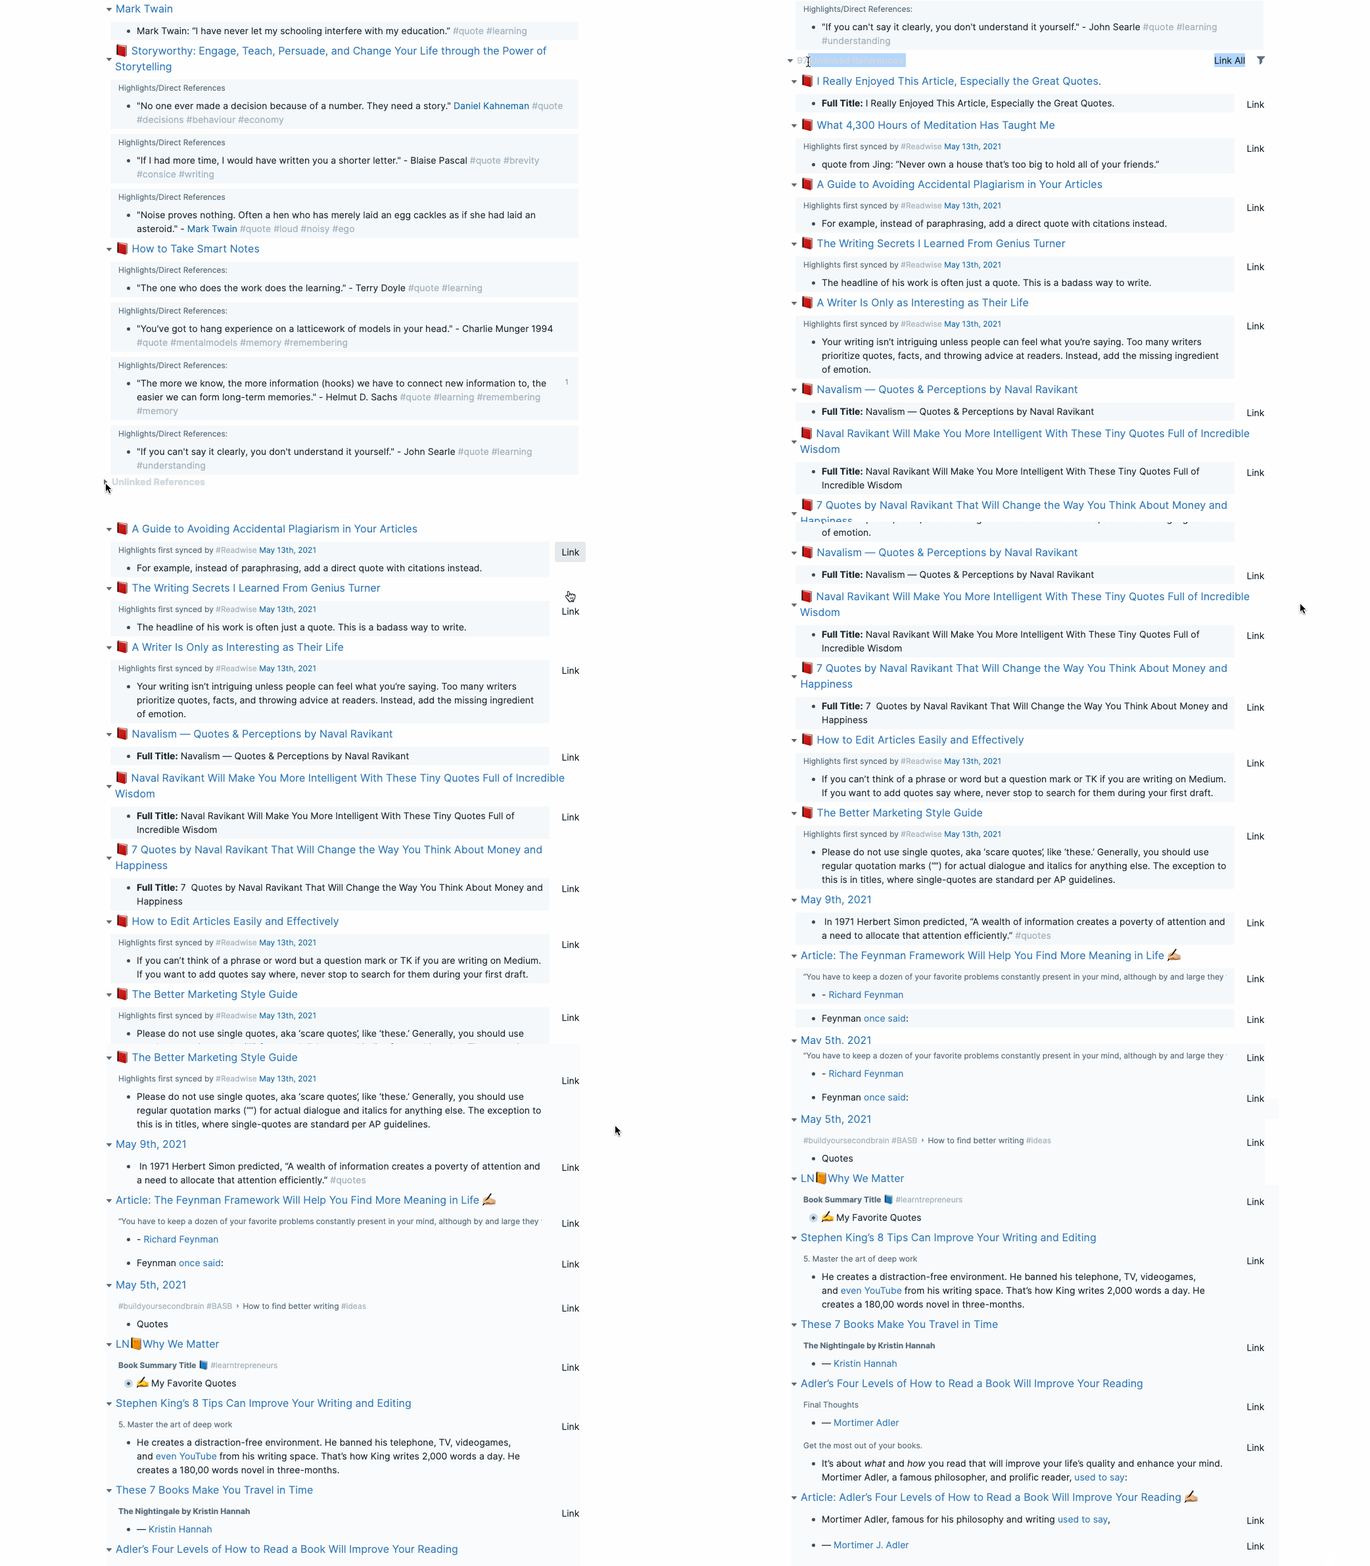
This function is networked thought in action and the reason you don’t need folders. When you create a page Roam automatically adds all related blocks from your database as references to your page.
How to apply this:
Whenever you write a note, add a tag to connect it with existing notes. After a few weeks, you built an index for your personal library. Your Roam Research Graph will work as your second brain.
Step 4: Create templates
Templates save you time and make your structure consistent. To create a template, follow the following structure:
• TemplateName #roam/templates
     • [[Template Title]]
            • Your template's content
When you want to use your templates, you type ;; and the template name will show up.
Here’s what it looks like in my workflow when creating a permanent note for my Zettelkasten.
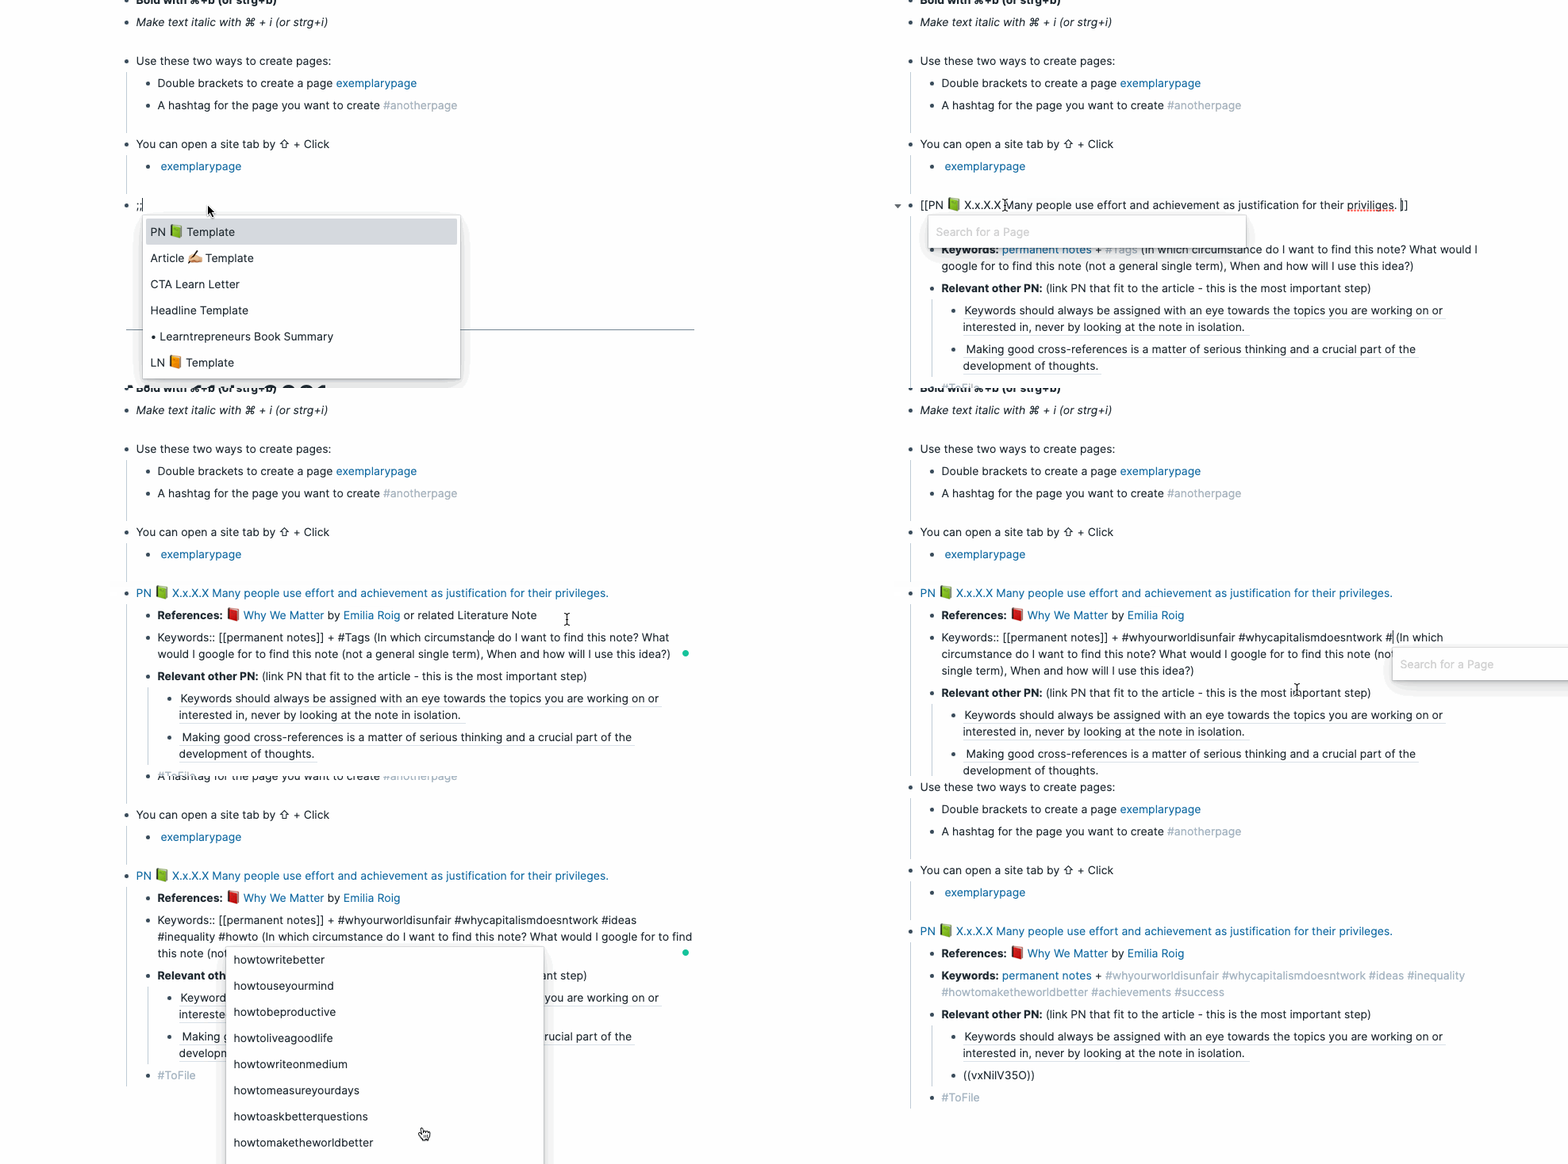
Another template I frequently use is the book summary template. Feel free to steal it.
• Book Summary #roam/templates
     • [[**Book Summary Title** 📘 #learntrepreneur]]
            •   📚 3-Sentence-Summary
            •   💭 What I think about it
            •   🤤 Who benefits from reading this book?
            •   🧬 How the book changed my life
            •   ✍️️ Favorite Quotes
How to apply this:
Whenever you want a repeatable structure (e.g., reflection questions, note-taking templates, or metadata), create a template for it.
Step 5: Get clear about your intentions
Why are you using Roam Research? Do you want to build your second brain? Accelerate your writing process? Structure your thinking? Showcase a digital garden?
While the first four steps are necessary for any Roam Research endeavor, the next steps depend on your needs.
How to apply this:
Learn what you need to learn. Here are some suggestions on the next steps:
- Writing → How to use Roam to outline an article in under 20 minutes.
- Knowledge management → Building a second brain with Roam.
- Learning in public → Creating a digital garden with Roam.
- Personal development → How to use Roam as a self-therapy and journaling tool.
You can do a zillion things with Roam Research, but these five steps will help you get started. Then, if you feel curious, you can type / inside your database and discover more useful functions, such as TODOs, date pickers, sliders, and a Pomodoro Timer.
“Roam is simple but not easy,” founder Conor White Sullivan said in an interview. It’s worth sticking through the steep learning curve. May Roam Research be as useful to you as it is for me.
Want to feel inspired and improve your learning?
Subscribe free to The Learn Letter. I read a book and 50 articles a week, and each Wednesday, you’ll receive the best in your inbox. This newsletter will make you find tools and resources that help you on your path to health, wealth, and wisdom.